Sunday, December 31, 2006

Customizable Widget Installer Tutorial

Some of you were not completely satisfied with my last tutorial on how to create a simple widget installer. You wanted to learn more. You wanted to learn about using the JSON-feeds, and above all you wanted to learn how to make the widget customizable.

Well, I hope you will like this tutorial. I will teach you how to make a customizable Table Of Contents Widget, and how to create an installer for this widget.

For the purpose of this tutorial it will be an extremely simple widget. If we make it too sophisticated, the code will be more complicated and less easy to understand. Our purpose is to take you by the hand and make you understand everything that happens. You can work from there to develop this widget into something useful for yourself.

What the TOC widget has to do
The TOC-widget will get the posts-feed from your blog, with a maximum of 100 posts. It will display a list of the posttitles. You can customize 3 settings: the widget title, the number of posts to display, and whether or not to sort the posts alphabetically.

What the Installer has to do
We will create an Installer. The Installer is a HTML-document with a form that contains a few fields and a few buttons and some javascript. It is best to host this installer from a webserver where you can upload HTML-pages to. I experienced big trouble with the Blogger page elements trying to embed the installer directly into the sidebar: Blogger messes everything up in a horrific way. So what we will do is add a simple button to the blog, and this button will invoke the widget installer. A visitor of your blog can then enter his/her data into the fields, push the Install-button, and the widget will be installed to his/her blog.

Okay, how do I get this done?
Step 1: Create a javascript function that retrieves a JSON-feed from Blogger
Step 2: Define javascript variables for the number of posts to display and for sorting
Step 3: Create a javascript function for displaying the table of contents
Step 4: Combine steps 1 to 3 into a Table Of Contents Widget and add it to your Blog
Step 5: Check that everything works as it should
Step 6: Create an input form for the Widget Installer
Step 7: Create a javascript function that builds the widget
Step 8: Combine steps 6 and 7 into a Widget Installer
Step 9: Upload the Installer and add a button to your Blog
Step 10: Test and debug the Installer

Well, it's not as difficult as it looks, and not as easy as you hope. Somewhere in between.

Step 1: Retrieving the JSON-feed from Blogger.
To retrieve the JSON-feed from Blogger, we will use the following line of javascript:

<script src="http://YOURBLOGNAME.blogspot.com/feeds/posts/default?alt=json-in-script&max-results=100&callback=showtoc"></script>

Replace YOURBLOGNAME with the name of your blog. This line of javascript asks Blogger to return the feed of your posts in JSON-format. JSON means: JavaScript Object Notation. The feed is returned as a set of Javascript Objects, and that makes it easy to handle for us in step 3. We also tell Blogger to return a maximum of 100 results (Blogger won't allow for more than 100, and the default size of feeds is 25). And finally we tell Blogger to send the JSON-feed to a Javascript function called showtoc. We'll write this function in step 3.

Step 2: Create variables for the Table of Contents
We will create 2 Javascript variables, using the following code:

<script style="text/javascript">
   var numposts = 20;
   var sortposts = true;
</script>

The variable numposts is the number of posts you want to show in the Table of Contents. If you set it to 20, the 20 most recent posts will be displayed.
The variable sortpost is a boolean variable, and can be true or false. If it is true, the posttitles will be sorted. If it is false, the posts will be in chronological order, from newest to oldest.
For your information: these variables make the widget customizable, as we will see later.

Step 3: Create a javascript function for displaying the table of contents.
Now we have to write the javascript function showtoc that we met in step 1. It takes a JSON-object (our feed) as input, rips the posttitles from it, and stores them in an array. If you don't know what an array is: it's a stack of data. We push the posttitles on this stack, and then we can sort them and display them on the screen. Take a look at the code, I have added comments, so even if you are new to Javascript you can get an idea of what is happening.

<script style="text/javascript>
function showtoc(json) {
   // create an array to hold all posttitles
   var toc = new Array();
   // get the number of entries that are in the feed
   // if there are more entries in the feed than we want to show, take the number we want to show
   var numentries = json.feed.entry.length;
   if (numentries > numposts) numentries = numposts;
   // main loop gets all the entries from the feed
   for (var i = 0; i < numentries; i++) {
      // if current value of i is bigger than number of entries in feed, then stop the loop
      if (i == json.feed.entry.length) break;
      // get the entry from the feed
      var entry = json.feed.entry[i];
      // get the posttitle from the entry
      var posttitle = entry.title.$t;
      // add the post to the array
      toc.push(posttitle);
   }
   // sort the array if needed
   if (sortposts) toc.sort();
   // write all posts to the page
   for (var i = 0; i < numentries; i++)
      document.write('<br/>' + toc[i] + '<br/>');
}
</script>

Step 4: Create the Widget
Open Notepad or any texteditor, and cut and paste the code from steps 3, 2 and 1 (in that order) to Notepad, and save the file to your desktop (better be safe than sorry). The Widget code is this:

<script style="text/javascript>
function showtoc(json) {
   // create an array to hold all posttitles
   var toc = new Array();
   // get the number of entries that are in the feed
   // if there are more entries in the feed than we want to show, take the number we want to show
   var numentries = json.feed.entry.length;
   if (numentries > numposts) numentries = numposts;
   // main loop gets all the entries from the feed
   for (var i = 0; i < numentries; i++) {
      // if current value of i is bigger than number of entries in feed, then stop the loop
      if (i == json.feed.entry.length) break;
      // get the entry from the feed
      var entry = json.feed.entry[i];
      // get the posttitle from the entry
      var posttitle = entry.title.$t;
      // add the post to the array
      toc.push(posttitle);
   }
   // sort the array if needed
   if (sortposts) toc.sort();
   // write all posts to the page
   for (var i = 0; i < numentries; i++)
      document.write('<br/>' + toc[i] + '<br/>');
}
</script>
<script style="text/javascript">
   var numposts = 20;
   var sortposts = true;
</script>
<script src="http://YOURBLOGNAME.blogspot.com/feeds/posts/default?alt=json-in-script&max-results=100&callback=showtoc"></script>

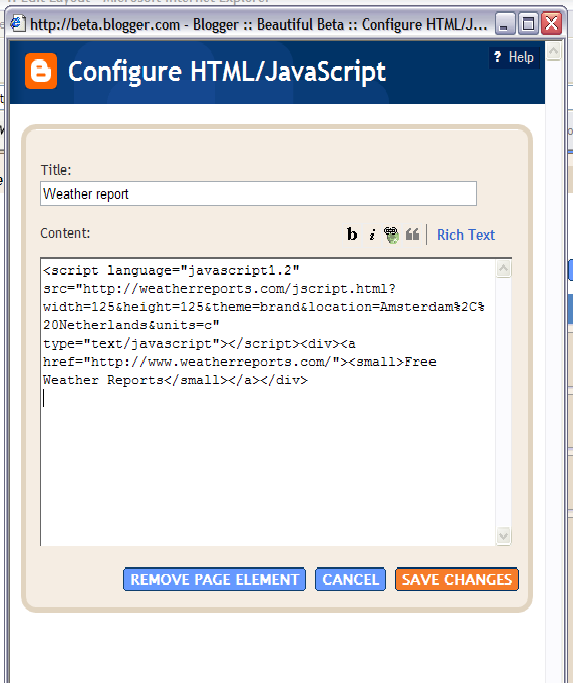
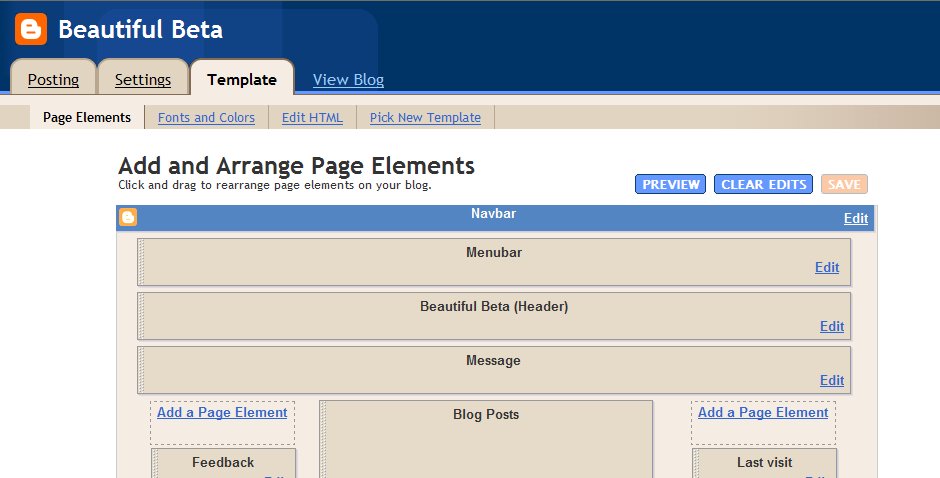
Now, go to your Blog Layout and open the Page Elements tab, click Add a Page Element and select a HTML/Javascript Element. Copy the Widget code from Notepad and paste it into the Page Element, and Save.
Probably Blogger will mess things up: it did so when I pasted the code into the Page Element. So you probably have to correct the code manually. If you have done so, save again and view your Blog. You will see the 20 most recent posttitles sorted alphabetically. Your Widget works!

Step 5: Check that everything works as it should.
Now go and play with the widget. Set numposts to 10, or to 50 if you like and see what happens. Also switch sortposts from true to false and back again. Just make sure that you understand how the widget works.
If you reached this step, your widget should work fine. I tested it on my testblog, and it executes fine.

Step 6: Create an input form for the widget installer.
Now that our widget is ready, we will start with our widget installer. For this installer we need a HTML-form with several fields and buttons. We need an input field for the Widget Title, so that the user can customize his/her own widget title. The Widget Title is a required field for adding the widget to Blogger. We'll also need an input field for the user's blogname. This is needed so that the user will get his/her own feed, and not yours. We also need an input field for the number of posts that the user wants to display. And a checkbox that has to be checked if the user wants his/her table of contents to be sorted. Finally there are the buttons: Reset to clear all fields, Customize to create the customized widgetcode, and Install to install the customized widget to the user's blog.
There is also a textarea in the form, that is hidden from view. This textarea will be used for storing the customized widgetcode. This textarea is required for passing the widget code to Blogger.
Here we go with the code:

<form method="POST" action="http://beta.blogger.com/add-widget" target="_blank">
<span style="width:130px;">Widget Title</span>: <input type="text" size=30 name="widget.title" value="Table of Contents"/><br/>
<span style="width:130px;">Blog url</span>: http://<input type="text" size=10 name="iblogurl" value="yourblogname"/>.blogspot.com<br/>
<span style="width:130px;">Number of posts</span>: <input type="text" size=3 name="inumposts" value="20"/><br/>
<span style="width:130px;">Sort posts</span>: <input type="checkbox" name="isortposts" checked/><br/>
<br/>
<input type="button" value="Customize" onclick="javascript:customize();">
<input type="button" value="Reset" onclick="javascript:defaultvalues();">
<input type="submit" disabled name="go" value="Install Widget"/>
<br/>
<textarea name="widget.content" style="display:none"></textarea>
</form>

Now just for the fun of it: wrap this form inside a HTML-document (using Notepad), save it to your desktop, and view it in your browser. You will have a nice (but not-working) preview of your widget installer. You can enter data into the fields, you can click buttons, but nothing will happen - yet. Wrapping it inside HTML? Oh, yes, that goes like this:

<html>
<body>
<form method="POST" action="http://beta.blogger.com/add-widget" target="_blank">
<span style="width:130px;">Widget Title</span>: <input type="text" size=30 name="widget.title" value="Table of Contents"/><br/>
<span style="width:130px;">Blog url</span>: http://<input type="text" size=10 name="iblogurl" value="yourblogname"/>.blogspot.com<br/>
<span style="width:130px;">Number of posts</span>: <input type="text" size=3 name="inumposts" value="20"/><br/>
<span style="width:130px;">Sort posts</span>: <input type="checkbox" name="isortposts" checked/><br/>
<br/>
<input type="button" value="Customize" onclick="javascript:customize();">
<input type="button" value="Reset" onclick="javascript:defaultvalues();">
<input type="submit" disabled name="go" value="Install Widget"/>
<br/>
<textarea name="widget.content" style="display:none"></textarea>
</form>
</body>
</html>

Now let's move on to step 7.

Step 7: Creating javascript functions to create the customized widget.
We have to write 2 javascript functions that respond to buttons being pressed. One to reset the form to its default values, and one to create the widget code. Let's start with a function for resetting the form field. The function defaultvalues() will set the form to its default values when the Reset button is clicked. Here is the code:

function defaultvalues() {
   document.getElementsByName("widget.title")[0].value = "Table of Contents";
   document.getElementsByName("iblogurl")[0].value = "yourblogname";
   document.getElementsByName("inumposts")[0].value = "20";
   document.getElementsByName("isortposts")[0].checked = true;
   document.getElementsByName("go")[0].disabled = true;
}

This function looks up the formfields by there name, and sets their contents. The last line greys out the Install-button, so that we can only click it if we have customized the widget settings.
The second function we will create is the function customize(), that is invoked when the user clicks the Customize-button. The code of this function is:

function customize() {
   // Get input values
   var blogurl = document.getElementsByName("iblogurl")[0].value;
   var numposts = document.getElementsByName("inumposts")[0].value;
   var sortposts = document.getElementsByName("isortposts")[0].checked;
   // Generate widgetcode
      var txtarea = document.getElementsByTagName("textarea")[0];
      txtarea.value = "\<script style='text/javascript'\>";
      txtarea.value = txtarea.value + "function showtoc(json) { ";
      txtarea.value = txtarea.value + "var toc = new Array(); ";
      txtarea.value = txtarea.value + "var numentries = json.feed.entry.length; ";
      txtarea.value = txtarea.value + "if (numentries \> numposts) numentries = numposts; ";
      txtarea.value = txtarea.value + "for (var i = 0; i \< numentries; i++) { ";
      txtarea.value = txtarea.value + "if (i == json.feed.entry.length) break; ";
      txtarea.value = txtarea.value + "var entry = json.feed.entry[i]; ";
      txtarea.value = txtarea.value + "var posttitle = entry.title.$t; ";
      txtarea.value = txtarea.value + "toc.push(posttitle); } ";
      txtarea.value = txtarea.value + "if (sortposts) toc.sort(); ";
      txtarea.value = txtarea.value + "for (var i = 0; i \< numentries; i++) ";
      txtarea.value = txtarea.value + "document.write('\<br/\>' + toc[i] + '\<br/\>'); } ";
      txtarea.value = txtarea.value + "\</script\>";
      txtarea.value = txtarea.value + "\<script style='text/javascript'\>";
      txtarea.value = txtarea.value + "var numposts = " + numposts + "; ";
      if (sortposts) { txtarea.value = txtarea.value + "var sortposts = true; "; }
         else { txtarea.value = txtarea.value + "var sortposts = false; "; };
      txtarea.value = txtarea.value + "\</script\>";
      txtarea.value = txtarea.value + "\<script src='http://" + blogurl + ".blogspot.com/feeds/posts/default?alt=json-in-script&max-results=100&callback=showtoc'\>\</script\>";
   // Show add button
      var addbutton = document.getElementsByName("go")[0];
      addbutton.disabled = false;
}

What happens here - you won't believe it - is that this javascript-function writes the javascript-code for the widget! Now that is kind of Baron of Munchhaussen, if you are familiar with this German nobleman who pulled himself out of the water by his own neck. The entire widget-code (without the comments) is written into the textarea of the form and the Install-button is enabled.

Step 8: Create the Widget Installer
From steps 6 and 7 we can now create the widget installer. Open Notepad, and create a textfile with the following content:

<html>
<script style="text/javascript">
function customize() {
   // Get input values
   var blogurl = document.getElementsByName("iblogurl")[0].value;
   var numposts = document.getElementsByName("inumposts")[0].value;
   var sortposts = document.getElementsByName("isortposts")[0].checked;
   // Generate widgetcode
      var txtarea = document.getElementsByTagName("textarea")[0];
      txtarea.value = "\<script style='text/javascript'\>";
      txtarea.value = txtarea.value + "function showtoc(json) { ";
      txtarea.value = txtarea.value + "var toc = new Array(); ";
      txtarea.value = txtarea.value + "var numentries = json.feed.entry.length; ";
      txtarea.value = txtarea.value + "if (numentries \> numposts) numentries = numposts; ";
      txtarea.value = txtarea.value + "for (var i = 0; i \< numentries; i++) { ";
      txtarea.value = txtarea.value + "if (i == json.feed.entry.length) break; ";
      txtarea.value = txtarea.value + "var entry = json.feed.entry[i]; ";
      txtarea.value = txtarea.value + "var posttitle = entry.title.$t; ";
      txtarea.value = txtarea.value + "toc.push(posttitle); } ";
      txtarea.value = txtarea.value + "if (sortposts) toc.sort(); ";
      txtarea.value = txtarea.value + "for (var i = 0; i \< numentries; i++) ";
      txtarea.value = txtarea.value + "document.write('\<br/\>' + toc[i] + '\<br/\>'); } ";
      txtarea.value = txtarea.value + "\</script\>";
      txtarea.value = txtarea.value + "\<script style='text/javascript'\>";
      txtarea.value = txtarea.value + "var numposts = " + numposts + "; ";
      if (sortposts) { txtarea.value = txtarea.value + "var sortposts = true; "; }
         else { txtarea.value = txtarea.value + "var sortposts = false; "; };
      txtarea.value = txtarea.value + "\</script\>";
      txtarea.value = txtarea.value + "\<script src='http://" + blogurl + ".blogspot.com/feeds/posts/default?alt=json-in-script&max-results=100&callback=showtoc'\>\</script\>";
   // Show add button
      var addbutton = document.getElementsByName("go")[0];
      addbutton.disabled = false;
}

function defaultvalues() {
   document.getElementsByName("widget.title")[0].value = "Table of Contents";
   document.getElementsByName("iblogurl")[0].value = "yourblogname";
   document.getElementsByName("inumposts")[0].value = "20";
   document.getElementsByName("isortposts")[0].checked = true;
   document.getElementsByName("go")[0].disabled = true;
}
<body>
<form method="POST" action="http://beta.blogger.com/add-widget" target="_blank">
<span style="width:130px;">Widget Title</span>: <input type="text" size=30 name="widget.title" value="Table of Contents"/><br/>
<span style="width:130px;">Blog url</span>: http://<input type="text" size=10 name="iblogurl" value="yourblogname"/>.blogspot.com<br/>
<span style="width:130px;">Number of posts</span>: <input type="text" size=3 name="inumposts" value="20"/><br/>
<span style="width:130px;">Sort posts</span>: <input type="checkbox" name="isortposts" checked/><br/>
<br/>
<input type="button" value="Customize" onclick="javascript:customize();">
<input type="button" value="Reset" onclick="javascript:defaultvalues();">
<input type="submit" disabled name="go" value="Install Widget"/>
<br/>
<textarea name="widget.content" style="display:none"></textarea>
</form>
</body>
</html>

Save this file as widgetinstaller.html to your desktop, and launch it in your browser. You have to allow for scripts and active content, but then you will see that your installer really works!

Step 9: Upload it and create a button to launch the installer
Upload the widgetinstaller.html file to one of your folders with your ISP webhost.
Now add a HTML-page element to your blog, give it an appropriate title, and add some text to describe the widget.
Then add a button using the following code:

<form action="_self"><input type="button" value="Add Table of Contents to Blog" onclick="window.open('http://YOURHOST/widgetinstaller.html','popupwindow','width=500, height=500'); return false" /></form>

Save the page element and view your Blog.

Step 10: Test and debug.
Now play around to check if everything works as it should.
Congratulations! You are done!

Beyond this point you are completely at your own risk!

If you want to improve this widget, here are some ideas:
- Add the post url to the posttitle
- Add the date to the posttitle
- Add an option to display a postsummary
- Add CSS-styling to the widget
- Add CSS-styling to the widget-installer
- Add a preview-pane to the widget-installer

Resources:
- JSON-documentation
- Delving into JSON-feeds on Beautiful Beta

Monday, December 25, 2006

Creating a Widget Installer

Several readers asked me to write a tutorial on how to make a one-click widget installer, like the one I made for installing the Recent Posts Widget. Well, that seemed a good idea, so here it is. The purpose is to make you understand how it works, so that you can create your own. Disclaimer: Brainless copy-paste won't work.

Step 1: Create a Widget
If you want to create a Widget Installer, obviously the first thing you need to do is to create the widget itself. A real one-click-installable widget should contain all the necessary code. So if there is javascript-code that need to be installed, try to embed it inside the widget.
Just for the fun of it, let's create a Random Quote Widget (thanks Annie).
Open your Blog's template, add a HTML/Javascript page-element, set the title to "Random Quote", and add the following javascript to its content:

<script language="JavaScript">
//store the quotations in arrays
quotes = new Array(6);
quotes[0] = "So many cats, so few recipes.";
quotes[1] = "Use the best: Linux for servers, Mac for graphics, Windows for Solitaire.";
quotes[2] = "That's not a haircut. That's a cry for help.";
quotes[3] = "The last thing I want to do is hurt you. But it's still on the list.";
quotes[4] = "Some days it's just not worth gnawing through the leather straps.";
quotes[5] = "Doing for blogging what Ghengis Khan did for social work.";
//calculate a random index
index = Math.floor(Math.random() * quotes.length);
//display the quotation
document.write("\n");
document.write(quotes[index]);
//done
</script>

This code is a javascript script. What it does is easy to understand. It creates a data structure called an array, with six elements. The elements are number 0 through 5. Then it calculates a random number from 0 to 5, and displays the array-element with this index. This is just plain javascript.
Save the widget, and see how it works. Every time you reload your page, a new quote will appear.

Step 2: Understand how widgets can be added to Blogger
Now that you have created your widget, you have to learn how you can add a widget to Blogger. That is explained in the Blogger Help pages. What you have to do is that you have to create a FORM. A form is a HTML-element, and can have input boxes, radio-buttons, check-boxes, buttons, and so on.

Step 3: Create a Widget Install Button
Now we will create our own Install Button using a form. Our form has to look like this:

<form method="post" action="http://beta.blogger.com/add-widget">
  <input name="widget.title" style="display:none" value="Random Quote"/>
  <textarea name="widget.content" style="display:none;">
     &lt;script language="JavaScript"&gt;
       //store the quotations in arrays
       quotes = new Array(6);
       quotes[0] = "So many cats, so few recipes.";
       quotes[1] = "Use the best: Linux for servers, Mac for graphics, Windows for Solitaire.";
       quotes[2] = "That's not a haircut. That's a cry for help.";
       quotes[3] = "The last thing I want to do is hurt you. But it's still on the list.";
       quotes[4] = "Some days it's just not worth gnawing through the leather straps.";
       quotes[5] = "Doing for blogging what Ghengis Khan did for social work.";
       //calculate a random index
       index = Math.floor(Math.random() * quotes.length);
       //display the quotation
       document.write("\n");
       document.write(quotes[index]);
       //done
       &lt;/script&gt;
    </textarea>
   <input type="submit" name="go" value="Add widget to your blog"/>
</form>

Let us take a closer look at this form. As usual with HTML, there is an opening-tag <form> and a closing-tag </form>. The content of the form has to be posted to the url http://beta.blogger.com/add-widget. This information is added to the form opening tag. The form has to contain 3 elements: the widget title, the widget content, and a button to submit the form to Blogger. The widget title is set using an Input Field in the form. The name of this input field has to be set to "widget.title", so that Blogger knows it is the widget title. The value of this field can be anything you like. The value is displayed on your Blog as the widget's title. In this example I set it to "Random Quote", but it could also be "A Very Deep Thought".

The widget content is the javascript-code from step 1. We put this javascript inside a textarea-field. The textarea has an opening tag and a closing tag. Put the javascript between these two tags. Inside this form, we have to make sure that the javascript is handled as text, and not as javascript. Therefore, replace all < with &lt; and replace all > with &gt;. The name of the textarea is set to "widget.content" so that Blogger knows that this field contains the widget content. The style of both the title input and the textarea is set to display:none, so that the user doesn't see them (but don't worry, it is there all the same).

Finally, there is an input button, the value is displayed as the button text.
If you copy this form and paste it to the end of the widget-code that is already in your sidebar, you will get a button below the widget, and clicking the button will install the widget to your visitor's blog.

Thursday, December 21, 2006

Recent Comments Widget Updated!

The Recent Comments Widget is updated. The new release lets you define your own CSS styling, and commentsummaries are no longer cut off in the middle of a word, but at the end. If you want to use the new release, first delete the current widget from your layout, and then reinstall it from my Downloads Page.

Type rest of the post here

Adding Google Bookmarks to your Bookmarks Bar

Some of you have installed the Social Bookmarking Bar that I developed a few months ago. I got a request to add Google Bookmarks to this bar, as many readers are using this service. Well, here it is. If you are new to this, first take a look at this post and install the Bookmark Bar.

Add Google with the following line of code. Put it in your template, inside the post widget, where all the other bookmark links are.

<a expr:href='"http://www.google.com/bookmarks/mark?op=add&amp;bkmk=" + data:post.url +  "&amp;title="+data:post.title' expr:onmouseout='"javascript:showsbtext(\"sbtxt" + data:post.id + "\",0);"' expr:onmouseover='"javascript:showsbtext(\"sbtxt" + data:post.id + "\",19);"' target='_blank'><img alt='Google' src='http://home.planet.nl/~hansoosting/images/icon_sb_goo.gif'/></a>

Sunday, December 17, 2006

Google Maps Tutorial

For some time now I have been looking into Google Maps, just to learn how to add a simple map to my Blog. Wouldn't you like to learn that as well? Okay, here is a tutorial!
In this post you will find a Google Map that does not give the exact location of Beautiful Beta Headquarters, but it would give them if I only would be so kind to provide the exact GPS location. So read on if you want to know how you could add this map to your Blog.

Before you set out, you have to know a few things, just to understand what is happening.

To work with Google Maps, Google has provided a lot of standard javascript functions. Those functions are used to draw the map, add markers, and add mapcontrols (zooming, panning, and so on). All these javascript functions together are called the Google Maps API: the Application Programmers Interface. Those functions give us an interface to work with the maps.

Second, you will need a key to work with Google Maps. This key is provided for a certain url. For each blog or website you have, you will need a key. You can get a key here. This key is a very long row of characters. Don't try to type it over, just copy and paste it into the code.

You have to add some javascript code to the head of your template. Insert it just above the </head>-tag.

The map itself will be drawn inside a <div id="map">. You can put this div anywhere, in a post, in your sidebar, or anywhere else.

So, here we go.

Step 1: back up your template.

Step 2: add the following javascript-code to your template head.

<!-- Google Maps -->
<script src='http://maps.google.com/maps?
file=api&amp;v=2&amp;key=YOUR_KEY_HERE' type='text/javascript'/>
<script src='http://www.google.com/uds/api?file=uds.js&amp;v=1.0&amp;source=uds-
msw&amp;key=YOUR_KEY_HERE' type='text/javascript'/>
<script type='text/javascript'>
function LoadMap() {
var map = new GMap(document.getElementById("map"));
map.centerAndZoom(new GPoint(YOUR_LONGITUDE, YOUR_LATITUDE), 3);
var point = new GPoint(YOUR_LONGITUDE, YOUR_LATITUDE);
var markertext = "YOUR_MARKER_TEXT";
var marker = new GMarker(point);
GEvent.addListener(marker, "click", function() {marker.openInfoWindowHtml
(markertext);});
map.addOverlay(marker);
}
GSearch.setOnLoadCallback(LoadMap);
</script>


In this code you have to insert your own data on some places.
YOUR_KEY_HERE: paste your Google Maps Key here.
YOUR_LONGITUDE, YOUR_LATITUDE: enter your longitude and lattitude here, as GPS-coordinates. Find them with Google Earth, with your GPS-navigator, or with a Geocoding-application that converts addresses to GPS-coordinates.
YOUR_MARKER_TEXT: enter some text for the marker balloon. You can use html here, but you have to escape double quotes by putting a back-sledge (\) in front of it, and you have to change all < by &lt; and so on.

If you save the template, and switch to another screen, you will receive a warning that your API-key is not valid. This is caused by the fact that you requested the key for your blog's url, and editing the template is done at the beta.blogger.com url. You can ignore this warning.

Step 3: Place the map on your blog

Now add the following div to your sidebar, or to a post.

< div id="map" style="width:360px; height:260px; border:solid 1px #000000;">Loading map...</div>

Save and view your blog.

Wednesday, December 13, 2006

Recent Posts Widget for FTP Blogs

Several people asked me for a Recent Posts Widget for FTP-Blogs. Well, here it is! It has the same functionality as the Recent Posts Widget that I developed last month for the Blogger-hosted blogs, using JSON. You can customize it, give it your own styling, and place it anywhere you like on your FTP-blog. Go to the Widget Installation Page for a fool's rush-in, or read on to learn more about this widget!

If you are using a Blogger FTP-blog, you do the post-editing and template-maintenance on Blogger, but your Blog is published to your own domain. Your atom and rss-feeds are published to your domain as well, as xml-files.

So, the first thing you have to do is set up your blog's feeds.

In this example you can see the settings for my ftp-testblog. The root of my domain is at http://home.planet.nl/~hansoosting. Here I created a folder called testfeed to hold the feed files. The resulting xml-file url after publishing the blog will be (in this example) http://home.planet.nl/~hansoosting/testfeed/rss.xml.

If you have set up the site feed, you can install the widget. From my Widget Installation Page click the button to launch the installer.

You can enter the settings for your widget here. Make sure you enter the right path to your rss.xml-file. Notice that the rss-feed contains a maximum of 25 posts.
Click the Create-button. Then select the code in the box, copy it, and paste it into the sidebar of your blog template.
Add some css to your template to make it look as nice as you can, and republish.
My css is extremely simple:

.bbrecpost {
margin-top:10px;
}
.bbrecpostsum {
font-style: italic;
}
.bbwidgetfooter {
margin-top: 10px;
margin-bottom: 10px;
}

Take a look at my FTP Testblog to see this widget in action.

I have only tested this widget both for a full feed and for a short feed, but without comments. I still have to check how to retrieve comments.

Tech Stuff.
I found an extremely clear tutorial on how to parse a xml-file with javascript.
As far as I understand, javascript can not be used to access files from another domain (obviously for security reasons). That is why - for the normal Blogger blogs - the JSON trick is needed. You make a call to the blogger-feed, it sends back a JSON-formatted file and calls your javascript-function to parse it.
Such things are not necessary with a FTP-blog. Your blog, the feeds, and the javascript are all in the same domain.

Tuesday, December 12, 2006

Style Switcher

Last night I discovered Purplemoggy's great blog, with interesting hacks. I stumbled on his template switcher, and today I couldn't resist the temptation to apply it to my own Blog as an experiment. So now, Beautiful Beta is a seasoned blog, as you can see in the sidebar! Select your mood, and the Blog will follow! Check out Purplemoggy's tutorial.

Sunday, December 10, 2006

Blogger Beta Templates

On this page you can find templates for Blogger Beta. Some of them are brand new, specially designed for Blogger Beta. Other ones are Blogger v2 oldies, that have been ported to Blogger Beta. You will find instructions on how to use the templates for your own blog. You can download the full XML-template, or, if you blog is filled with hacks and modifications, only the CSS-skin. A preview of all templates is provided as well. Enjoy!

Instructions
Always make a backup of your old template before uploading a new one.
The templates provided here are based on the most simple blog available: a header, posts, 1 sidebar, and a footer. The sidebar contains only a profile widget and an archives widget.

Some templates are available in 2 versions of the template that you can use: the XML-template, or the CSS-skin.
Some exist of 1 ZIP-file, containing all the stuff you need.

If you upload the XML-template to your blog, all your widgets will be lost. So if you plan to do this, it is best to open all the widgets, copy-paste the contents to a text file, and save it, so that you can add the widgets again after uploading the new template.
If you want to use your old template, but only want to change the skin, use the CSS-skin. Open your template in HTML-mode, and remove the skin-content, that is the part of the code between <b:skin> and </b:skin>, and replace it with the new skin.

Templates

The Hobbit


Angel Or Evil


Giraffe


Friday, December 8, 2006

Google Analytics Conversion Funnel

Yesterday I promised to post some more about Google Analytics. Well, here it is. It's about the Conversion Funnel.

I set it up last week to see how many of my visitors reach the Install Recent Posts Widget-button on my Widget Download and Installation Page. So, after reaching my Blog (by Google, by reference, or otherwise) at the Recent Post Widget Updated post, my visitor has to navigate to the Downloads page, and then has to click the button. Those 3 steps are called a Funnel, and a visitor who reaches the destination is called a Conversion.

Let's take a look at my Funnel:

As you can see, the first step of the Funnel is my post called "Recent Posts Widget Updated". There have been 75 visits to this post. People reach this post through Entrance Points, displayed at the left. From this 75 visitors 52% move on through the funnel to the downloads-page, and 48% leave to another blog-page (the Exit Points, to the right). In the end, only 16% of the visitors reach the end of the Funnel, and click the Install-button.

Setting up a Funnel is easy, you just have to enter a list of all the page urls that are part of the funnel. The Funnel information is very usefull if you have e-commerce goals, and want to know how people are reaching your payments-page (browsing the products, adding stuff to their shopping-cart, ordering, paying is a typical e-commerce funnel), but as a blogger you can use it to track how people reach your most valuable information.

You can also monitor clicks on external links, such as my Install-button, by adding some extra code to the link. This is clearly explained in the help-section of Google Analytics.

Thursday, December 7, 2006

Google Analytics

How do people find your blog? How do they navigate around it? Which posts are hot, and which are not? That's interesting to know, and that's why you could start using Google Analytics, as I do.

Google Analytics is a free tool, that gives you important and useful feedback on visitor behavior on your blog. The only thing you have to do is add some html/javascript code to your blog template, and set up your Google Analytics account, wait a few days, and watch the data roll in.

Start by setting up an account at Google Analytics. As a Blogger user you already have a Google account, and you use the same username and password to set up your Analytics account.
These steps are easy to follow, and will be done in just a few minutes.

Without any further setting-up, this easy setup will provide you already with interesting data. Let me show you some.

This picture shows part of the Google Analytics Desktop. 


Top left you see a graph that show the number of visitors to your blog, the number of page-views, and as a result the average number of page-views per visitor.
Top-right you can see that more than 40% of my visitor are regular ones. Bottom-right you can see where visitors come from. A lot of them seem to find my blog by means of google, but as you can see about 10% comes from Annie's Blogger University and from Ramani at Hackosphere. And bottom-left you can see where my visitors come from. All over the world, but mostly Europe, Asia and the US of A.

Now let's take a better look at sources and keywords on how people find my blog.

As you can see, google is by far the most important source for leading people to my blog. Ramani is a very good source to my blog: you can see that 227 visitors found Beautiful Beta through Hackosphere. And that number has gone up with 2% since the last period. The top 5 keywords that are used by people point out that most of them are looking for templates. This makes me realize that my blog's home page has no visible link to a templates page. You really have to scroll down to the labels widget, click 'templates', and then you can view 3 posts that have links to templates. So that is obviously a point to improve.
What D1 and D2 mean will be dealt with later.

Now let's take a look into the popularity of my content:

As you can see my home page receives the most hits, which is to be expected. Most popular posts are the Widget Installation and Downloads page and the new Blogger Beta Template page. So it would be a good idea to link to these posts from my sidebar. The information behind these simple screens is vast. Did you know that over 30% from the people who visited my downloadspage come from USA and Canada?

In a next tutorial I will tell more about defining Destination pages, setting up Conversion Funnels, and measuring Goals.

All Feeds by Feedburner

Your blog generates feeds, you have these links on your blog pages, but how many people have actually subscribed to your feeds?

Feedburner is used by many of you to monitor those statistics. But thanks to Ramani I recently discovered that there is something like auto-detection, that makes other feedreaders or browsers (like Firefox) automatically detect and subscribe to feeds. Those subscribers are not monitored in the Feedburner-count, so here is a tutorial on how to make all feeds available by Feedburner only. It made my statistics jump from 35 subscribers to 70 in little more than a week.

Open your template in HTML-mode. Close to the top you will find this line of code:

<b:include data='blog' name='all-head-content'/>

This line will not expand to the code behind it, even if you check the Expand Widget Template box. Now view your blog, right-click on it, and from the pop-up menu select "Source" (or the equivalent menu option from your browser). This will bring up a Notepad window, with the HTML-code of the displayed version of your blog. Look carefully at the top lines, and you will see that the widget-code is replaced with:

<meta content='text/html; charset=UTF-8' http-equiv='Content-Type'/>
<meta content='true' name='MSSmartTagsPreventParsing'/>
<meta content='blogger' name='generator'/>
<link rel="alternate" type="application/atom+xml" title="YourBlogName - Atom" href="http://yourblog.blogspot.com/feeds/posts/default" />
<link rel="alternate" type="application/rss+xml" title="YourBlogName - RSS" href="http://yourblog.blogspot.com/feeds/posts/default?alt=rss" />

<link rel="service.post" type="application/atom+xml" title="YourBlogName - Atom" href="http://www.blogger.com/feeds/yourblogid/posts/default" />
<link rel="EditURI" type="application/rsd+xml" title="RSD" href="http://beta.blogger.com/rsd.g?blogID=yourblogid" />


In this example, YourBlogName stands for the title of your blog, yourblog.blogspot.com is your blog's url, and yourblogid is a long number, the id of your blog. The two lines with link rel="alternate", indicated in red, let newsreaders auto-detect your blogs feeds. So we have to change these lines to point them in the direction of your Feedburner feed. We'll do this in 2 easy steps.

Step 1: Make a backup of your template.

Open your template in HTML-mode, and download the template as a backup.

Step 2: Replace the widget code.

Remove the line:

<b:include data='blog' name='all-head-content'/>

Replace it with:

<meta content='text/html; charset=UTF-8' http-equiv='Content-Type'/>
<meta content='true' name='MSSmartTagsPreventParsing'/>
<meta content='blogger' name='generator'/>
<link href='http://feeds.feedburner.com/yourblogname' rel='alternate' title='RSS' type='application/atom+xml'/>
<link rel="service.post" type="application/atom+xml" title="YourBlogName - Atom" href="http://www.blogger.com/feeds/yourblogid/posts/default" />
<link rel="EditURI" type="application/rsd+xml" title="RSD" href="http://beta.blogger.com/rsd.g?blogID=yourblogid" />


Replace the http://feeds.feedburner.com/yourblogname with the url to your Feedburner feed.

Now save your template.

Now that we have fixed the auto-detection part, there is still the issue of the feed-link on your posts page. This feed-link has to be made invisible, so that your visitor has no other option than following the link to your Feedburner feed.
The standard feedlink provided by Blogger is of class .feed-link.

Open your template in HTML-mode, and inside the skin look for the following line:

.feed-link {

Below this line add:

display: none;

If there is no class .feed-link defined in your template, define it with:

.feed-link { display:none; }

Now save your template.

Congratulations! Your visitors have no escape from Feedburner!

Friday, December 1, 2006

Recent Posts Widget Updated!

Many users are very thrilled by the Click-n-Go Recent Posts Widget. And most of them would like to style it to their own liking. That is why I have added the option to define your own CSS-styles for the widget.

If you did already install the widget to your blog, and are satisfied with its style, you don't have to change anything. If you want to upgrade it to have CSS, remove the page element, go to the Widget Installation & Downloads Page and re-install the widget.

Beautiful Beta spans the globe

Beautiful Beta is now a trusted Blogger resource worldwide, spanning 34 countries in 5 continents. Visitors come from places up north, like Akureyri (Iceland) to cities like Melbourne (Australia), and from Santiago (Chile) in the west to Tokyo (Japan) in the east.
Welcome, all nations of the world!

Thursday, November 30, 2006

Click-n-Go Widget Installer

Most of my visitors like high-value blogging tools, but don't like to mess around with hacking, HTML, CSS and all that tech stuff. Well, visitors, rejoice! Because now you can install my Recent Posts widget and my Recent Comments widget without any hacking. Click one of the buttons, enter your blog name and the widget-settings, and add it to your blog. That's all folks! Spread the word.

Sunday, November 26, 2006

A Simple Search Widget

Today I added a simple search box to my Blog, that will search the content of my blog, and displays all the posts that contain the search-expression. I got it from Phydeaux, and made a one-click installable widget out of it. Check it out, and install it from here.

Widget Installation and Downloads Page

On this page you can find all widgets and downloads that I created for Beautiful Beta. You can use all widgets and downloads free of charge, as long as you give credits on your site to Beautiful Beta. All downloads and widgets have been tested for Internet Explorer 6 and Firefox. If you notice any problems or bugs, please report them as a comment.

Javascript sourcefile

Most Beautiful Beta hacks and widgets make use of some javascript-functions. These functions are bundled in a javascript-library, that should be added to your template.
Add the following code to your template's head, just above the </head>-tag:
<script src='http://home.kpn.nl/oosti468/downloads/beautifulbeta.js' type='text/javascript'/>

Or download the file and host it from your own location. Right-click the link, and save the file to your computer.

Picasa Albums Widget


The Picasa Albums Widget displays your public Picasa Albums in your sidebar.
This widget requires that your browser accepts script execution.
Learn how to install and customize this widget, or click the button and use the Click-n-Go Widget Installer to add this widget to your blog.
The coding of the widget was developed by Beautiful Beta.


Recent posts widget
The Recent Posts Widget displays recent posts summaries in your sidebar. You can customize this widget to display the recent posts of any blogger blog that you like, you can customize the number of posts to display, whether or not to display a postsummary and the size of this summary. And you can use a standard styling, or you can define your own CSS styling.
This widget requires that your browser accepts script execution.
Learn how to install and customize this widget, or click the button and use the Click-n-Go Widget Installer to add this widget to your blog.
The coding of the widget was developed by Beautiful Beta and Hackospere.

Recent comments widget

The Recent Comments Widget displays recent comments in your sidebar. You can customize this widget to display the recent comments of any blogger blog that you like, you can customize the number of comments to display, whether or not to display the author and the comment-date, and the size of the comment summary. You can define your own CSS styling to integrate it completely with the styling of your blog.
This widget requires that your browser accepts script execution.
Learn how to install and customize this widget, or click the button to add this widget to your blog.
The coding of this widget was developed by Beautiful Beta and Hackospere.

Search widget
The Search widget allows you to search your blog. It requires no javascript or customization. Just click the button below to install it on your Blog.

Recent Posts Widget for FTP Blogs
The Recent Posts Widget for FTP displays recent posts summaries in the sidebar of your FTP-blog. You can customize this widget in several ways. You can customize the number of posts to display, whether or not to display a postsummary and the size of this summary. And you can define your own CSS styling.
This widget requires that your browser accepts script execution.
Learn how to install and customize this widget, or click the button and use the Click-n-Go Widget Installer to add this widget to your blog.

Weather Report Widget
This is the first installable widget I created, it puts a weather report for Amsterdam on your blog.


Google Calendar Widget
The Google Calendar Widget displays events from your Google Calendar in your sidebar. You can customize this widget to display the events of any public Google Calendar that you like; you can customize the number of events to display, whether or not to display the calendarname, calendardescription and owner, as well as whether or not to display event details. You can style the widget by adding some new classes tom your CSS styling.
This widget requires that your browser accepts script execution.
Learn how to install and customize this widget, or click the button to add this widget to your blog.
The coding of this widget was developed by Beautiful Beta.

Plaxo Pulse Widget
The Plaxo Pulse Widget displays events from your Plaxo Pulse in your sidebar. The widget needs JSON-formatted input, so you first have to Pipe your Plaxo Pulse Feed with Yahoo! Pipes. So first of all, read the installation instructions!
This widget requires that your browser accepts script execution.
Click the button to add this widget to your blog.
The coding of this widget was developed by Beautiful Beta.

Aorta Widget
The Aorta Widget displays a mashup from your Blogger Blog, your Picasa Web Albums, your Flickr Photo's and your YouTube Channel. Read the installation instructions!
This widget requires that your browser accepts script execution.
Click the button to add this widget to your blog.
The coding of this widget was developed by Beautiful Beta.

Saturday, November 25, 2006

Delving into JSON feeds

Developing my latest JSON-based widgets was done with a lot of trial and error, without a good understanding of the JSON-format and lacking knowledge of how to access the feed and retrieve the data. So this weekend I did some research and developed a small javascript program to analyze the feeds. It is tech stuff, so don't worry if you don't understand it.

I found some documentation on the JSON-feed format, based on Google Calendar. A little later I discovered a simple tutorial on how to browse through JSON objects.

I changed this into a recursive javascript function, that browses the complete JSON-feed-tree, and displays all keys and all values. You can use is to research any JSON-feed.

Create a simple HTML-page, using the following code.

<html>
<head>
<script type='text/javascript'>
function listkeys(feedobj,depth) {
for (key in feedobj) {
for (var i=0; i<depth; i++) document.write('- ');
document.write(key+' = '+feedobj[key]+'<br/>');
listkeys(feedobj[key],depth+1);}
}

function showfeedcontent(json) {
listkeys(json,0);
}</script>
</head>
<body>
JSON FEED PARSER
<br/><br/>
<script src="http://beautifulbeta.blogspot.com/feeds/posts/default?alt=json-in-
script&callback=showfeedcontent"></script>
</body>
</html>


In this code replace the beautifulbeta.blogspot.com feed reference to your own blog's feed.

Open the HTML-page in your browser, and the complete feed will be displayed.

Customizable Recent Posts Widget

Now that we understand the JSON-feed mechanism, it is quite easy to convert all our feeds to customizable widgets, that you can copy to your own sidebar. You can use the widget to display your own recent posts on your own blog, but you can in fact display the post-feeds of any Blogger blog you like.

Installation is easy.

Install Widget

Go to the Widgets & Downloads Page and click the Install Recent Posts button.

This will bring up a pop-up window in which you can customize the widget settings, before adding it to your blog.

Replace 'beautifulbeta' with the name of your own blog.

Set the number of recent posts you want to show (default = 5).

If you want the post date to be displayed, check the box (default = checked).

If you want a post summary to be displayed, check the other box (default = checked), and enter the number of characters of the postsummary that you want to display (default = 100).

If you want the standard styling, select the 'standard' radio-button. If you want to define your own CSS-definitions, select 'custom css'. After installing the widget you will have to add CSS-definitions to your blog's template for the classes .bbrecpost, .bbrecpostsum and .bbwidgetfooter.

Now click the 'Customize' button, or click 'Reset' to return to the default values. If you are satisfied with the settings, click 'Add Widget To My Blog'. This will bring up the Blogger-screen that lets you select your Blog to install the widget to. Click the blue 'Add' button to add the widget to your blog.

Update 1: the widget did not work for Short feeds. That is fixed now, it will work for both Full and Short feeds.

Update 2: it is not longer needed to add the javascript library to your template. The widget now realy is plug and play.

Update 3: you can install the widget using Beautiful Beta's Widget Installer. Click-n-Go, no hacking or editing needed!

If your Blog is published to your own FTP-site, click here for the FTP-version of this widget.

Thursday, November 23, 2006

Customizable Recent Comments Widget

It is a Recent Comments Widget. You can install it to your Blog with one mouseclick. You can customize it without any template-hacking. It is completely flexible. And it is free!

It is based on the new JSON-feeds that are available from Blogger. That means you can have as many comments in your sidebar as you wish, you can have long or short summaries, and you can choose to add the date and the posttitle to the comment-summary as well. Now THAT's what we call flexibility.

I was inspired to create this widget by Ramani and Hoctro, who implemented a JSON-based Recent Comments widget. But I still missed date and posttitle options, things I recently hacked with in my own way. So I took up where Ramani stopped, and created this widget that you can see now in my sidebar.

How to Install the Widget

Go to the Widgets & Downloads Page and click the Install Recent Comments button.

This will bring up a pop-up window in which you can customize the widget settings, before adding it to your blog.

Replace 'beautifulbeta' with the name of your own blog.

Set the number of recent posts you want to show (default = 5).

If you want the post date to be displayed, check the box (default = checked).

If you want a post summary to be displayed, check the other box (default = checked), and enter the number of characters of the postsummary that you want to display (default = 100).

If you select standard styling, a predefined styling will be used. If you select custom css, you can define your own styling using the classes bbrecpost, bbrecpostsum and bbwidgetfooter.

Now click the 'Customize' button, or click 'Reset' to return to the default values. If you are satisfied with the settings, click 'Add Widget To My Blog'. This will bring up the Blogger-screen that lets you select your Blog to install the widget to. Click the blue 'Add' button to add the widget to your blog.

Wednesday, November 22, 2006

New Recent Comments Hack

Recent comments can be displayed in the sidebar of your Blog using the Feed page element. As a Feed-url you can provide "http://yourblogname/feeds/comments/full" to get the last 5 comments, with author and name. That's the standard functionality, and I really didn't like it at all. The standard comments-feed has a few things missing. First of all, the first few words of the comment are displayed as a link, but clicking the link brings you to the top of the post-item page in stead of to the comment itself. That is because of a bug in the link that is provided by Blogger. Second, I want to see on what post a person has commented. The feed doesn't provide for the post title, but we could obtain it from the link - and that is where this hack kicks in.

Our objective is to create a Recent Comments widget, that displays recent comments in the following format: "On [date & year] [author] commented on [post title]: [comment-summary] (more)".

Here is how you do it.

Step 1: Make a backup of your template.

Step 2: Add a standard recent comments widget to your Blog.
From the dashboard select your Blog and click Layout. Go to the Template tab and select Page Elements. In your sidebar add a Feed page element.
Enter your comment feed url.


Tick Item dates and Item sources on.


Save your template and view your Blog. You now have a standard recent comments widget.

Step 3: Add some javascript to the head of your template.
If you added my social bookmarking hack, you can skip this step.
If not, go to the Template tab, click Edit HTML, and add the following line of code to your templates head, just above the </head>-tag:

<script src='http://home.planet.nl/~hansoosting/downloads/beautifulbeta.js' type='text/javascript'/>

Save the template.

Step 4: Replace the widget coding
Go to the Template tab, and click Edit HTML. Now find your sidebar, and look for the new widget you just created. It will look something like this:

<b:widget id='Feed2' locked='false' title='Recent comments' type='Feed'/>

Now click Expand Widget Templates, and look for the widget. Use Ctrl-F to find it, using it's ID (in this example Feed2).
Replace the entire widget by the following code:

<b:widget id='Feed2' locked='false' title='Recent comments' type='Feed'>
<b:includable id='main'>
<h2><data:title/></h2>
<div class='widget-content'>
<ul expr:id='data:widget.instanceId + "_feedItemListDisplay"'>
<b:loop values='data:feedData.items' var='i'>
<li>
<b:if cond='data:showItemDate'>
<b:if cond='data:i.str_published != ""'>
<span class='item-date'>
On&#160;<data:i.str_published/>
</span>
</b:if>
</b:if>
<b:if cond='data:showItemAuthor'>
<b:if cond='data:i.author != ""'>
<span class='item-author'>
&#160;- <data:i.author/> commented on
</span>
</b:if>
</b:if>
<script type='text/javascript'>getPostTitle(&quot;<data:i.alternate.href/>&quot;)</script>&#160;:
<span class='item-title'>
<data:i.title/>&#160;<script type='text/javascript'>getCommentLink(&quot;<data:i.alternate.href/>&quot;)</script>
</span>
</li>
</b:loop>
</ul>
<b:include name='quickedit'/>
</div>
</b:includable>
</b:widget>


Save your template.

Your hack is implemented now.

Tech stuff.
I started with the standard-widget. First I canged the order of the <data>-elements to date, author, comment-summary. The comment-summary is represented by <data:i.title/>. In the standard widget, the comment summary is embedded in an anchor that links (or should link) to the comment. The consruction looks like this:

<a expr:href='data:i.alternate.href'><data:i.title/></a>

The link-address of the <data:i.alternate.href/>-field has the following format: "http://yourblog.blogspot.com/year/month/posttitle.html#number".
We will use this link to parse the posttitle from it, and to retrieve the correct comment-permalink. The correct permalink to the comment has the folowing format:
"http://yourblog.blogspot.com/year/month/posttitle.html#comment-number".

I wrote 2 js functions. The first function, getPostTitle, is handed the alternate.href, and writes the post title as a hyperlink to the post-item-page to the document. The second function, getCommentLink, is handed the alternate.href, builds the correct permalink, and displays it as a (more)-link.

Thursday, November 16, 2006

Weather Report Widget

Widgetizing your Blog is the new thing to explore here on Beautiful Beta. Ramani shows how to add random Einstein quotes to your Blog. Phydeaux3 started all this showing Flickr Puppies, and even Hoctro now shows a Flickr Zeitgeist widget. So it is time that Beautiful Beta follows these fellows, with a useful Weather Forecast Widget. And ofcourse a tutorial on how to create this widget on your own Blog and make it easy-to-install for your readers.

You have to follow 3 easy steps:

  1. Create the widget
  2. Add it to your Blog
  3. Add an Install-button to your Blog
Step 1: Create the Widget

Go to WeatherReports.com, scroll down and click Add WeatherReports To Your Site.
In the next screen, enter your city, select the colors and style of the weatherbox. After entering all your selections, you will go to the next screen automatically. Take a look at the preview, and select and copy the HTML-code.


Step 2: Add the Widget to your Blog

Add an new HTML page element to the sidebar of your Blog. Paste the code that you copied into the page element, and set its title to "Weather Report".


Don't save it yet, but go to step 3.

Step 3: Add an Install-button

Now we are going to add a button, that installs the widget on your visitors blog when it is clicked. In fact, we'll add a form with several input fields, but only the button will be visible. Here we go.

<form action="http://beta.blogger.com/add-widget" method="post">
<input value="Weather Report" name="widget.title" type="hidden"/>
<textarea style="display:none;" name="widget.content">

&lt;script type="text/javascript" language="javascript1.2" src="http://weatherreports.com/jscript.html?width=125&height=125&theme=brand&location=Amsterdam%2C%20Netherlands&units=c"&gt;</script>&lt;div><a href="http://www.weatherreports.com/"&gt;<small&gt;Free Weather Reports&lt;/small&gt;</a></div></textarea>
<input value="Install to Blog" name="go" type="submit"/>
</form>


The text between the <textarea>-tags is the html of your widget. Please notice that each < is replaced with &lt;, and that each > is replaced with &gt;.

Now save the page element and view your Blog.


For an example look here.

If you want more information on how to add third-party widgets to your blog, take a look at these help pages.

Monday, November 13, 2006

FTP publishing now works in Blogger Beta

Today I tried to create a Blog at my own internet-provider, using the new Blogger FTP publishing facility. I was a little afraid to do so, because of all the difficult questions I had to answer, such as the host path, filenames, etcetera. But to my great astonishment I set it up in less than 30 seconds!

So, that is good news if you want to publish a weblog at your own domain, or if you want to integrate weblog and classic webpages at one place on the web.

Tuesday, October 24, 2006

Poll Closed

The poll is closed now. The results: Peek-A-Boo post and Second Sidebar are most popular hacks!

Sunday, October 22, 2006

A simple Photo Album

If you like to have a simple photo album on your blog, here is an easy to implement solution, without any javascript! It is just CSS, and a bunch of html-links to the pictures you want to display. I found this toy at Stu Nichols's CSSPlay, and wanted to share it with you.

Attention: if you add this to your Blog using the Blogger editor (as I did), Blogger adds <br/>-tags where it sees new lines. These <br/>-tags mess up the album when displayed with Firefox.

First, you have to add the following CSS to your style-sheet.

/* Photo album */
#album {
width:320px;
height:360px;
background:#eee url(deer.jpg) 0 40px no-repeat;
border:1px solid #aaa;
margin:0 auto;
text-align:center;
}
.gallery {
position: relative;
margin: 320px 0 0 0;
width: 320px;
padding: 0;
list-style-type: none;
}
.gallery img {
border: 0;
}
.gallery li {
float: left;
}
.gallery li a, .gallery li a:visited {
font-size:11px;
float:left;
text-decoration:none;
color:#000;
background:#fff;
text-align:center;
width:26px;
height:26px;
line-height:24px;
border:1px solid #444;
margin:2px;
}
.gallery li a img {
position:absolute;
top:-320px;
left:0;
visibility:hidden;
border:0;
padding:0;
}
.gallery li a img.landscape {
top:-280px;
}
.gallery li a img.portrait {
left:0;
border-left:40px solid #eee;
border-right:40px solid #eee;
}
.gallery li a:hover {
background:#ddd;
}
.gallery li a:active img, .gallery li a:focus img {
visibility:visible;
}
.gallery li a:active, .gallery li a:focus {
background:#444;
color:#fff;
}
*/ End photo album */


Second, find the a:link definition in your CSS, and add definitions for a:visited, a:hover and a:active. you can format these anyway you like, but they must be in your template for the photo-album to work correctly (because of a bug in IE).

Third, at the spot where you want the album to appear, add the following html:

<div id="album">
<ul class="gallery">
<li><a href="#nogo">01<img class="landscape" src="image1.jpg" alt="image 1" title="image 1" />&;t;/a></li>
<li><a href="#nogo">02<img class="portrait" src="image2.jpg" alt="image 2" title="image 2" />&;t;/a></li>
<li><a href="#nogo">03<img class="portrait" src="image3.jpg" alt="image 3" title="image 3" />&;t;/a></li>
<li><a href="#nogo">04<img class="landscape" src="image4.jpg" alt="image 4" title="image 4" />&;t;/a></li>
<li><a href="#nogo">05<img class="portrait" src="image5.jpg" alt="image 5" title="image 5" />&;t;/a></li>
<li><a href="#nogo">06<img class="portrait" src="image6.jpg" alt="image 6" title="image 6" />&;t;/a></li>
<li><a href="#nogo">07<img class="landscape" src="image7.jpg" alt="image 7" title="image 7" />&;t;/a></li>
<li><a href="#nogo">08<img class="landscape" src="image8.jpg" alt="image 8" title="image 8" />&;t;/a></li>
<li><a href="#nogo">09<img class="portrait" src="image9.jpg" alt="image 9" title="image 9" />&;t;/a></li>
<li><a href="#nogo">10<img class="landscape" src="image10.jpg" alt="image 10" title="image 10" />&;t;/a></li>
</ul>
</div>


Each img src has to point to a picture. The class of this picture can be portrait or landscape.

Saturday, October 21, 2006

Using a Lightbox

I got a request for developing a Lightbox plug-in for Blogger Beta. Well, here it is!

A Lightbox is a sort of pop-up box, displaying an image over the webpage. It is not a new browser window, but a box that floats over your current browser window.

If you want to see an example, please click on the image below.


If you want to have this Lightbox on your Blog, follow the instructions:

Step 1: Backup your template.

Step 2: Download the following files:
LightBox Javascript code.
Loading-image.
Close-image.

Step 3: Add the following line of code to your template, inside the <head>-section:
<script type='text/javascript' src='yourhost/lightbox.js'/>
Replace "yourhost" with the domainname of the place where you host your scripts and images. Save your template.

Step 4: Upload files
Upload the image files to your webhost. Open the javascript-file in Notepad, and edit the url's of the image-files, so that they link to your host. Save the javascript-file, and upload it too.

Step 5: Adding CSS
Add CSS to style your lightbox.

#lightbox{
background-color:#eee;
padding: 10px;
border-bottom: 2px solid #666;
border-right: 2px solid #666;
}
#lightboxDetails{
font-size: 0.8em;
padding-top: 0.4em;
}
#lightboxCaption{ float: left; }
#keyboardMsg{ float: right; }

#lightbox img{ border: none; }
#overlay img{ border: none; }


Step 6: Editing your post
Create a post and upload an image. Enter your text, and just make it a nice post.
Then, inside the <a href="..." > tags, add rel="lightbox" and title="Your title" and publish your post. If you click on the image, the large version of your image will pop out of the screen.

Check out this link for more info on lightboxes.

Adding a second sidebar to your Blog - part 2

In one of my older posts, I gave a short tutorial on how to add a second sidebar to your Blog. Recently I got some comments of people who got stuck, so I decided to post a second, more detailed tutorial on how to rig up a second sidebar.

Understanding structure and layout.

First of all, you have to understand that your Blog Layout consists of several sections. The standard Blogger template has a Header-section, a Sidebar-section, a Main-section and a Footer-section. Inside these section Blogger puts the widgets, these are the page-elements that you can select from the Template-tab.

Now, let's take a look at the structure of a standard Blog. If you create a fresh, new Blog, the Page Elements Tab looks like this:

This Layout has 4 sections: Header, Main (with the Blog Posts), Sidebar and Footer.
The HTML-template looks like this (the line-numbers are added for reference only):

010: <body>
020: <div id='outer-wrapper'>l<div id='wrap2'>
030: <!-- skip links for text browsers -->
040: <span id='skiplinks' style='display:none;'>
050: <a href='#main'>skip to main </a>
060: <a href='#sidebar'>skip to sidebar</a>
070: </span>
080: <div id='header-wrapper'>
090: <b:section class='header' id='header' maxwidgets='1' showaddelement='no'>
100: <b:widget id='Header1' locked='true' title='Second Sidebar (Header)' type='Header'/>
110: </b:section>
120: </div>
130: <div id='content-wrapper'>
140: <div id='main-wrapper'>
150: <b:section class='main' id='main' showaddelement='no'>
160: <b:widget id='Blog1' locked='true' title='Blog Posts' type='Blog'/>
170: </b:section>
180: </div>
190: <div id='sidebar-wrapper'>
200: <b:section class='sidebar' id='sidebar' preferred='yes'>
210: <b:widget id='BlogArchive1' locked='false' title='Blog Archive' type='BlogArchive'/>
220: <b:widget id='Profile1' locked='false' title='About Me' type='Profile'/>
230: </b:section>
240: </div>
250: <!-- spacer for skins that want sidebar and main to be the same height-->
260: <div class='clear'> </div>
270: </div> <!-- end content-wrapper -->
280: <div id='footer-wrapper'>
290: <b:section class='footer' id='footer'/>
300: </div>
310: </div></div> <!-- end outer-wrapper -->
320: </body>


Lines 010 and 320 are the body-tags. All your code has to be between these two tags.

Lines 020 and 310 are the div-tags for two wrappers, the wrapper called "outer-wrapper" and the wrapper called "wrap2". In CSS you can define fonts, colors, and other styling for these wrappers. We'll look into CSS later in this tutorial.

Lines 080 to 120 contain the header. As you see, there is a div-wrapper (080 and 120), section-tags (090 and 110) and the widget that contains the header itself (100).

Lines 130 to 270 contain the content. Content means here: blog posts and sidebar. There is a div-wrapper called "content-wrapper" (130 and 270), and inside this wrapper there are 2 more wrappers: the "main-wrapper" (140-180) and the "sidebar-wrapper" (190-240).

Inside the main-wrapper we find the main-section (150 and 170) with the Blog-widget (160). This widget contains your posts.

Inside the sidebar-wrapper we find the sidebar-section (200 and 230) with an Archive-widget (210) and a Profile-widget (220).

And finally we have a Footer (280-300).

Now that we understand the structure, let's take a look at the formatting of this template. In the stylesheet you will fund the following code:

#outer-wrapper {
width: 660px;
padding: 10px;
....... }

#main-wrapper {
width: 410px;
float: left;
....... }

#sidebar-wrapper {
width: 220px;
float: right;
........ }


The outer-wrapper has a width of 660 pixels. The padding is set to 10 pixels, so that everything that is inside the outer-wrapper stays 10 pixels from the border. So that leaves 660 - 20 = 640 pixels for main-wrapper and sidebar-wrapper.

The main-wrapper has a width of 410 pixels, and floats to the left.

The sidebar-wrapper had a width of 220 pixels, and floats to the right. Together, main-wrapper and sidebar-wrapper have a width of 410 + 220 = 630 pixels. In the middle there is a space of 640 - 630 = 10 pixels.
So, if we want to squeeze in a second sidebar, we have to do something to create space. As it is now, it won't fit in.

Adding a second sidebar.

First, we will add the sidebar to the structure of the template, then we will add it to the CSS, and make it fit into the page.

Step 1: Backup the template.

Step 2: Make your right-sidebar unique.
Change lines 190 and 200:

190: <div id='right-sidebar-wrapper'>
200: <b:section class='sidebar' id='right-sidebar' preferred='yes'>


In your CSS style-sheet, change "#sidebar-wrapper" to "#right-sidebar-wrapper".
If you save your template now and view your blog, it should look okay.

Step 3: Add a left sidebar by adding new lines of code:

131: <div id='left-sidebar-wrapper'>
132: <b:section class='sidebar' id='left-sidebar' preferred='yes'/>
133: </div>


Now save your template, and take a look at the Page Elements tab.


You can see there is a new section, just below the header and above the posts. But it is not at the left side of the screen jet. Therefore, we have to add some CSS.

Step 4: Add CSS for the left sidebar.
In your CSS-style sheet, add the following code:

#left-sidebar-wrapper {
width: 220px;
float: left;
word-wrap: break-word;
overflow: hidden;
}


Your Page Layout tab will show something like this:


The sidebar-section is now to the left, but your right-sidebar is suddenly below your posts. That is because the width of 2 sidebars and a main-section counts up to 840 pixels, and that is more than the width of the outer-wrapper (660 pixels).

Step 5. Change outer-wrapper and header-wrapper width.
In your CSS-stylesheet look for the #header-wrapper and #outer-wrapper definitions, and change the width from 660 to 860.

Step 6. Add a page element.
Now finally, add a page element to your left sidebar.
Your Blog Layout will look like this now:

Sunday, October 15, 2006

Windows Live Writer

This post is written with the use of Windows Live Writer, a desktop application program for editing and posting posts to your Blog.

It integrates with Beta Blogger. I can download any post from Blogger into WLW, edit it, and post it again.

I can add hyperlinks, pictures, and even blockquotes. And it really is WYSIWYG.

It has the possibility to edit html as well, so I guess it is a powerful tool for you bloggers.

There is one problem: I can't add Blogger Labels.

Table of Contents

A little while ago I thought it would be nice to have a Table of Contents on my Blog. So I experimented a bit on how this could be done without a lot of hacking, and also without outside help such as del.icio.us.

Ramani has some interesting hacks, and 2 of them I combined into a new one.

If you want to list all your posts in one page, you can use the following url:
http://yourblog/search/label/?max-results=100
Is it as simple as that?
Yes it is!
The max-results is limited to 100 results. This is a Blogger server-side restriction. So it will give a TOC for only the 100 latest posts.

If we want to display only post titles we have to do a little more hacking, but Ramani has explained how to do this on archive pages. I just applied this to label pages.

Edit your template, find the Blog widget, and replace the entire main-includable with this txt-file. Save your template.

Add the url to a convenient place in your menubar or sidebar, and ready you are.

Adding a menubar to your Blog

Missing a real menubar on you Blog? This hack explains how you can add a simple menubar to the top of your Blog. It is in fact a simple link list, and that is a standard page element of Blogger Beta. I have added a new section at the top of the Blog Page, and the link list is inside that section. Of course there are some tricks to play, such as hiding the link list title, and showing the links list elements side by side. Here is how it is done.


In this Page Layout you can see where I have added the Menubar. The code of this section is highlighted in red:

<div id='header-wrapper'>
<b:section class='menubar' id='menubar' maxwidgets='1' showaddelement='yes'>
<b:widget id='LinkList2' locked='true' title='Menubar' type='LinkList'/>
</b:section>

<b:section class='header' id='header' maxwidgets='1' showaddelement='no'>
<b:widget id='Header1' locked='false' title='Beautiful Beta (Header)' type='Header'/>
</b:section>
</div>


To the CSS-part of your template, add coding for the menubar-id:

#menubar h2 {display:none;}

#menubar ul {
list-style: none;
}
#menubar li {
float: left;
}

#menubar a:link, #menubar a:visited, #menubar a:hover {
padding: 5px;
display: block;
color: $headerTextColor;
}

#menubar a:hover {
background-color: $headerCornersColor;
}


The menubar title is hidden, so that only the options are visible. The list-elements are set to none, so that there are no bullets in front of the menu options. And if a menu-option is hovered over, it is highlighted.

Random Rotating Banners

Gabriel Lau published a great hack today that offers you a Random Rotating Banner on your Blog! This is a standard Wordpress-plugin, but now we Bloggers can use this one too. Nice hack, Gab!

Saturday, October 14, 2006

Whish List

Wordpress seems to be a big example to bloggers that visit Beautiful Beta, as many requests and wishes have to do with Wordpress-like functionality. So why not convert to Wordpress then? Never mind.....

Here you will find a collection of all the wishes and ideas that were dropped here, that could be developed for Blogger Beta. Feel free to contribute, or point out solutions to these wishes.

Calender navigation
Navigate your posts by clicking on the date in a Calendar that is in the sidebar of your Blog.

Peek-A-Boo Comments under the post
At the bottom of the post there should be a "N Comments" link. If you click on this link, the comments should be displayed below the post, without going to the Item page. Clicking again should hide the comments. As an add-on, unread comments should be displayed as "N new comments".

Random link text in Peek-A-Boo posts
Some users want a different "Read More" text on every post.

Bug List

Several readers pointed out several bugs to me, so I guess it is time to set up a Bug List here, to give an overview and make it easier for you to report new ones that we have to look in to.
So here we go.

Peek-A-Boo error on Older Pages
When you are on an Older Page, a post that has no <span id="fullpost"> will have a "Read More"-link, while it should be hidden.
It seems that the javascript-function checkFull(id) is not called properly when on a second page.

Wrong text on social bookmarking button bar
When you are on an Older Page, the text at the beginning of the buttonbar says "Loading.." in stead of "Bookmark this post".
It seems the javascript-function that sets the default text to "Bookmark this post" is not called properly when on a second page.


Please leave your bugs or possible solutions here.

Wednesday, October 11, 2006

Magazine Style Drop Caps

Dropcaps like in a fancy magazine is what you see in this post. I saw instructions for this trick at Mandarin Design and I wanted to share this beauty with you all.

It is done by putting the first letter of your post within <span>-tags, with a class named "dropcaps". In your CSS-definitions, you can set this first letter to Very Big, and in a different color. I use the following CSS-definition:


In your post, the first letter is inside a span like this: <span class="dropcaps">D</span>. The result is very nice: a large capital that stretches over 5 lines.