Blogger has made a lot of the latest features, including search preferences for meta tag optimization for SEO friendly. However, with standard features of bloggers, not enough to be number one in the Search Engines.
Most Blogger template maker just make a standard meta tag alone, of course, the next task is for the blog owner to better optimize how the blog more successful in the Search Engine. Not quite with a great view, a lot of backlinks, good content and so on.
Below I share the best meta tag for blogger, for the optimization of your blog.
Log into the template editor and find the following code:
<title><data:blog.pageTitle/></title>
Replace with the following code (edit your blog name, keywords, description, etc.)
<!-- Meta Title ErrorPage/404 -->
<b:if cond='data:blog.pageType == "error_page"'>
<title>404: Sorry the page you are looking is not found | blogname</title>
</b:if>
<b:if cond='data:blog.pageType != "item"'>
<!-- Meta Title Search Page -->
<b:if cond='data:blog.searchQuery'>
<title>Keyword search for :: <data:blog.searchQuery/> :: | blogname</title>
</b:if>
<b:if cond='data:blog.pageType == "archive"'>
<!-- Meta Title Archive Page -->
<title>Post Archive by Month <data:blog.pageName/> | blogname</title>
<!-- Meta Description Archive Page -->
<meta expr:content='"Post Archive by Month " + data:blog.pageName + " learn more please visit blogname"' name='description'/>
<b:else/>
<b:if cond='data:blog.pageType == "static_page"'>
<!-- Meta Title Pages -->
<title><data:blog.pageName/> | blogname</title>
<!-- Meta Description Pages -->
<meta expr:content='data:blog.pageName + ". Please read the article " + data:blog.pageName + " learn more please visit blogname"' name='description'/>
<b:else/>
<!-- Meta Title Label Page -->
<b:if cond='data:blog.searchLabel'>
<title>Search for Label :: <data:blog.pageName/> :: | blogname</title>
<!-- Meta Description Label Page -->
<meta expr:content='"Search for category ::" + data:blog.pageName + ":: learn more please visit blogname."' name='description'/>
<b:else/>
<!-- Meta Title Homepage -->
<title><data:blog.pageTitle/></title>
<!-- Meta Description Homepage -->
<meta expr:content='data:blog.pageTitle + " Write your blog description here."' name='description'/>
</b:if>
</b:if>
</b:if>
<!-- Meta Keyword Homepage-->
<meta content='keyword1, keyword2, etc' name='keywords'/>
<b:else/>
<!-- Meta Title Post Page -->
<title><data:blog.pageName/> - blogname</title>
<!-- Meta Description Active Post Page -->
<b:if cond='data:blog.metaDescription'>
<meta expr:content='data:blog.metaDescription' itemprop='description'/>
<b:else/>
<!-- Show if the Meta Description post Page is not active-->
<meta expr:content='data:blog.pageName + ". Please read the article " + data:blog.pageName + " learn more please visit blogname"' name='description'/>
</b:if>
<!-- Meta Keyword Post Page -->
<meta expr:content='data:blog.pageName + ", keyword1, keyword2, dst"' name='keywords'/>
</b:if>
Once you've added the meta tag before, please adjust or replace the meta tags on
Friday, June 14, 2013

Thursday, May 23, 2013
Adding Contact Form Widget For Blogspot
For blogspot users, maybe when you want to add a contact form, you use EmailMeForm, FoxyForm, etc.. Now you do not need to use it again. Because Blogger has now officially released the Contact Form Widget. Although I see myself still no third parties on this widget, but at least with this new widget simplify your job.
Some features of this contact form widget is a notification widget when the user not filling his name, the email is not correct, or empty messages, which is definitely a notification that a message has been sent. Email will be sent to the owner of the blog, via email listed when creating a blog.
For those of you who want to install this widget contact form is very easy. You just add the widget as usual. Then select more gadgets.
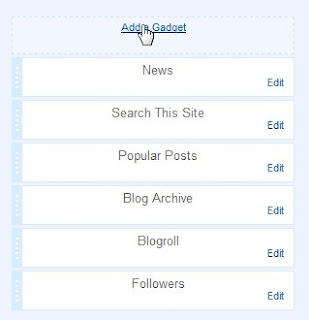
 Now contact form widget appears on your blog. You can put a contact form widget anywhere, either in the sidebar or footer, depending on your taste.
This contact form you can also place it on a static page, for example on page or post. I will explain in the next post. See you.
Some features of this contact form widget is a notification widget when the user not filling his name, the email is not correct, or empty messages, which is definitely a notification that a message has been sent. Email will be sent to the owner of the blog, via email listed when creating a blog.
For those of you who want to install this widget contact form is very easy. You just add the widget as usual. Then select more gadgets.


This contact form you can also place it on a static page, for example on page or post. I will explain in the next post. See you.
Saturday, May 11, 2013
New trick to remove Navbar on Blogspot?
Actually this is an old trick I rewrite. Previously, I have to give a tutorial on removing the navbar, but through the edit css. It is a way to remove blog navbar with the latest methods and also legal. Because this time bloggers provide distinctive features that allow users to remove blog navbar.
How to remove blogspot navbar?
1. Login to your Blogger account 2. Click on the dropdown menu and then select the layout

3. Click edit on navbar widget

4. Once options appear, select Off and then Save

5. Done. Now the blog navbar is hidden
So this is a tutorial on how to remove blogspot navbar. Hopefully this new way of getting easier for us to cultivate our blog
How to remove blogspot navbar?
1. Login to your Blogger account 2. Click on the dropdown menu and then select the layout

3. Click edit on navbar widget

4. Once options appear, select Off and then Save

5. Done. Now the blog navbar is hidden
So this is a tutorial on how to remove blogspot navbar. Hopefully this new way of getting easier for us to cultivate our blog
Friday, May 3, 2013
How to Custom Robots.txt for Blogspot?
Robots.txt serves to prevent web crawlers work with web robots from accessing all or part of a website if it is publicly viewable. Essentially a robots.txt file on a web site will serve as a request that specified robots ignore specified files or directories when crawling a site.
If you use the wordpress.org platform Blog, robots.txt file can create yourself via file manager in cpanel, but if you are blogspot user then there are steps that need to be before activating robots.txt (disabled by default).
1. Login to your Blogger account and go to your blog dashboard
2. Click on Settings >> Search preferences
 3. Edit your Custom robots.txt the choose Yes to enable custom robots.txt content
 4. Then fill with the following command
User-agent: Mediapartners-Google
Allow:/
User-agent: Googlebot
Disallow: /?m=1
Disallow: /?m=0
Disallow: /*?m=1
Disallow: /*?m=0
User-agent: *
Disallow: /search?*
User-agent: Twitterbot
Allow:/
User-agent: *
Disallow: /search
Disallow: /p/*
Disallow: /view/*
Allow: /
Sitemap: http://beautifulbeta.blogspot.com/feeds/post/default?orderby=UPDATED
Note: red letters replace with your own blog
5. Save your jobs
For websites with multiple subdomains, each subdomain must have its own robots.txt file. If example.com had a robots.txt file but sub.example.com not, the rule which would apply for example.com would not apply to a.example.com
If you use the wordpress.org platform Blog, robots.txt file can create yourself via file manager in cpanel, but if you are blogspot user then there are steps that need to be before activating robots.txt (disabled by default).
1. Login to your Blogger account and go to your blog dashboard
2. Click on Settings >> Search preferences


User-agent: Mediapartners-Google
Allow:/
User-agent: Googlebot
Disallow: /?m=1
Disallow: /?m=0
Disallow: /*?m=1
Disallow: /*?m=0
User-agent: *
Disallow: /search?*
User-agent: Twitterbot
Allow:/
User-agent: *
Disallow: /search
Disallow: /p/*
Disallow: /view/*
Allow: /
Sitemap: http://beautifulbeta.blogspot.com/feeds/post/default?orderby=UPDATED
Note: red letters replace with your own blog
5. Save your jobs
For websites with multiple subdomains, each subdomain must have its own robots.txt file. If example.com had a robots.txt file but sub.example.com not, the rule which would apply for example.com would not apply to a.example.com
Thursday, May 2, 2013
List of dofollow blog sites PR 4 and up
Instead you tired submit articles to article directories. We'd better collect wrote, url sites (blogs that provide its comment box only) dofollow (at least PR 4). By leaving a comment on dofollow blog, someday your blog PR will certainly rise when the PR update.
The following are List of dofollow blog sites PR 4 and up
PR 7
1. http://www.dmnews.com/cms/dm-news/af...ing/38280.html
2. http://www.linuxjournal.com/node/1000200
3. http://www.linuxjournal.com/node/1000203
4. http://www.linuxjournal.com/node/1000123
PR 6
1. http://dag.wieers.com/
2. http://www.dmnews.com/cms/dm-news/af...ing/38210.html
3. http://www.dmnews.com/cms/dm-news/af...ing/38152.html
4. http://www.linuxjournal.com/node/1000104
5. http://www.linuxjournal.com/node/1000107
6. http://www.linuxjournal.com/node/1000114
7. http://www.linuxjournal.com/node/1000125
8. http://www.linuxjournal.com/node/1000128
9. http://www.linuxjournal.com/node/1000129
10. http://www.linuxjournal.com/node/1000131
11. http://www.linuxjournal.com/node/1000132
12. http://www.linuxjournal.com/node/1000134
13. http://www.linuxjournal.com/node/1000135
14. http://www.linuxjournal.com/node/1000136
15. http://www.linuxjournal.com/node/1000115
16. http://www.linuxjournal.com/node/1000117
17. http://www.linuxjournal.com/node/1000124
18. http://www.linuxjournal.com/node/1000126
19. http://www.netmag.co.uk/zine/discove...myspaceeconomy
20. http://www.searchenginejournal.com/r...veadvertising- ad-voting/4629/
21. http://www.vinnylingham.com
PR 5
1. http://www.dmnews.com/cms/dm-news/affiliate-marketing/39080.html
2. http://www.dmnews.com/cms/dm-news/ad-serving/39087.html
3. http://exilejedi.livejournal.com/152359.html
4. http://flickr.com/photos/beausf/351847182/in/photostream/
5. http://www.webkrauts.de/2007/03/08/neustart/
6. http://www.searchenginejournal.com/best-seo-blog-of-2005-bestsearch-blog-awards/2696/
7. http://www.searchenginejournal.com/all-wikipedia-links-are-nownofollow/ 4288/
8. http://www.seopedia.org/tips-tricks/social-media/the-digg-algorithmunofficial-faq
PR 4
1. http://www.biggerpockets.com/renewsblog/2006/11/27/real-estatecarnival-20
2. http://www.biggerpockets.com/renewsblog/2006/09/21/breakingnews-pinnacle-development-partners-llc-underinvestigation/
3. http://www.mikebogo.com/ultimate-stumbleupon-resource.php
4. http://www.searchenginejournal.com/jim-boykins-blog-best-linkbuilding-blog-of-2006/4202/
5. http://www.searchenginejournal.com/link-building-measuringdirectory-value/4502/
6. http://www.searchenginejournal.com/the-why-how-and-who-ofmarketing- in-stumbleupon/4470/
7. http://www.searchenginejournal.com/vote-search-engine-journals-2005-search-blogs-awards/2641/
8. http://www.seopedia.org/contextual-advertising/google-adsenseadwords/adsense-now-available-for-romanian-languagewebsites/
9. http://www.seopedia.org/spam/e-mails/myspace-sending-spam-emails
10. http://www.theblogstudio.com/index.php/v5/blogComments/eight_tips_to_build_quality_traffic/
The following are List of dofollow blog sites PR 4 and up
PR 7
1. http://www.dmnews.com/cms/dm-news/af...ing/38280.html
2. http://www.linuxjournal.com/node/1000200
3. http://www.linuxjournal.com/node/1000203
4. http://www.linuxjournal.com/node/1000123
PR 6
1. http://dag.wieers.com/
2. http://www.dmnews.com/cms/dm-news/af...ing/38210.html
3. http://www.dmnews.com/cms/dm-news/af...ing/38152.html
4. http://www.linuxjournal.com/node/1000104
5. http://www.linuxjournal.com/node/1000107
6. http://www.linuxjournal.com/node/1000114
7. http://www.linuxjournal.com/node/1000125
8. http://www.linuxjournal.com/node/1000128
9. http://www.linuxjournal.com/node/1000129
10. http://www.linuxjournal.com/node/1000131
11. http://www.linuxjournal.com/node/1000132
12. http://www.linuxjournal.com/node/1000134
13. http://www.linuxjournal.com/node/1000135
14. http://www.linuxjournal.com/node/1000136
15. http://www.linuxjournal.com/node/1000115
16. http://www.linuxjournal.com/node/1000117
17. http://www.linuxjournal.com/node/1000124
18. http://www.linuxjournal.com/node/1000126
19. http://www.netmag.co.uk/zine/discove...myspaceeconomy
20. http://www.searchenginejournal.com/r...veadvertising- ad-voting/4629/
21. http://www.vinnylingham.com
PR 5
1. http://www.dmnews.com/cms/dm-news/affiliate-marketing/39080.html
2. http://www.dmnews.com/cms/dm-news/ad-serving/39087.html
3. http://exilejedi.livejournal.com/152359.html
4. http://flickr.com/photos/beausf/351847182/in/photostream/
5. http://www.webkrauts.de/2007/03/08/neustart/
6. http://www.searchenginejournal.com/best-seo-blog-of-2005-bestsearch-blog-awards/2696/
7. http://www.searchenginejournal.com/all-wikipedia-links-are-nownofollow/ 4288/
8. http://www.seopedia.org/tips-tricks/social-media/the-digg-algorithmunofficial-faq
PR 4
1. http://www.biggerpockets.com/renewsblog/2006/11/27/real-estatecarnival-20
2. http://www.biggerpockets.com/renewsblog/2006/09/21/breakingnews-pinnacle-development-partners-llc-underinvestigation/
3. http://www.mikebogo.com/ultimate-stumbleupon-resource.php
4. http://www.searchenginejournal.com/jim-boykins-blog-best-linkbuilding-blog-of-2006/4202/
5. http://www.searchenginejournal.com/link-building-measuringdirectory-value/4502/
6. http://www.searchenginejournal.com/the-why-how-and-who-ofmarketing- in-stumbleupon/4470/
7. http://www.searchenginejournal.com/vote-search-engine-journals-2005-search-blogs-awards/2641/
8. http://www.seopedia.org/contextual-advertising/google-adsenseadwords/adsense-now-available-for-romanian-languagewebsites/
9. http://www.seopedia.org/spam/e-mails/myspace-sending-spam-emails
10. http://www.theblogstudio.com/index.php/v5/blogComments/eight_tips_to_build_quality_traffic/
Monday, April 22, 2013
Submit XML Sitemap for Blogspot
Google finally released an XML sitemap for blogspot. Usually to indexed quickly, you are prompted to put atom.xml or RSS Feed to Google Webmaster Tools. With the release of XML sitemap for blogger, now you can work more easily. But is valid only for Blogspot, not for Custom Domain.
Blogger has been providing a wide range of new features, including a New look of Blogger HTML editor. The new look aims to make it easier for blogspot users to edit HTML. And unbeknownst to the public, Google has released an XML Sitemap for blogspot, and it is very beneficial for us. Because the XML sitemap will inform all existinghttp://beautifulbeta.blogspot.com/ blog URLs to search engines. And information structure created by this sitemap, will give employees full information to the search engine crawlers, so this is our advantage over a blog article that quickly indexed by Google.
After Blogger XML Sitemap released, of course we had to put it to Google Webmaster Tools, as we usually do to speed up the search engine Google indexed all blog articles. So how do I make a sitemap? Blogger will create anXML sitemap for Blogspot. To access the sitemap, you only need to type your blog url and ends with sitemap.xml, for example:
http://beautifulbeta.blogspot.com/sitemap.xml
How to put XML Sitemap into Google Webmaster Tools?
How to submit Blogspot sitemap using sitemap.xml Sitemap, go to http://google.com/webmaster/tools >> choose Sitemap menu >> add sitemap.xml

 Finally glad to Release Blogger XML Sitemap, so you do not have to bother using the feed url and atom.xml again, simply submit your blogspot sitemap.xml, and it already represents all the information available in the blogspot url companions.
Hope it helps and useful.
Finally glad to Release Blogger XML Sitemap, so you do not have to bother using the feed url and atom.xml again, simply submit your blogspot sitemap.xml, and it already represents all the information available in the blogspot url companions.
Hope it helps and useful.
Blogger has been providing a wide range of new features, including a New look of Blogger HTML editor. The new look aims to make it easier for blogspot users to edit HTML. And unbeknownst to the public, Google has released an XML Sitemap for blogspot, and it is very beneficial for us. Because the XML sitemap will inform all existinghttp://beautifulbeta.blogspot.com/ blog URLs to search engines. And information structure created by this sitemap, will give employees full information to the search engine crawlers, so this is our advantage over a blog article that quickly indexed by Google.
After Blogger XML Sitemap released, of course we had to put it to Google Webmaster Tools, as we usually do to speed up the search engine Google indexed all blog articles. So how do I make a sitemap? Blogger will create anXML sitemap for Blogspot. To access the sitemap, you only need to type your blog url and ends with sitemap.xml, for example:
http://beautifulbeta.blogspot.com/sitemap.xml
How to put XML Sitemap into Google Webmaster Tools?
How to submit Blogspot sitemap using sitemap.xml Sitemap, go to http://google.com/webmaster/tools >> choose Sitemap menu >> add sitemap.xml


New Look on Blogger HTML Editor
Blogger HTML Editor now changed since April 9, 2013. With the presence of a new look, Blogger automatically adds the latest features to pamper the users.
The following is the new look of Blogger HTML editor.

I think the new look of Blogger HTML Editor is increasingly easier to understand the structure of a Blogger template.

The following is the new look of Blogger HTML editor.

Some of the changes, including:
1. Expand Widget Templates removal, because all the tags are generated or is not hidden as before
2. Adding "Jump to widget" button, this is making easier to edit the widget.
3. Preview Template Editor is now integrated with it, like Macromedia Dreamweaver
4. Adding "Revert Changes" button, to restore the code that we edit
5. Using "SyntaxHighligter" (colors code), to facilitate the editing code.
6. Adding the "Format template", to compile and tag code added.
7. Using Collapse system to display the hidden code, characterized by "►"
8. Adding Ctrl + Shift + F and Ctrl + Shift + R functions
I think the new look of Blogger HTML Editor is increasingly easier to understand the structure of a Blogger template.
How to find Expand Template function, if this function has been removed?
Refer back to points 1 and 7 above. You just need to expand the code by clicking on the mark "►". For example, you want to look for CSS, CSS is actually there, just click ► on <b:skin> ... </ b: skin>

It takes time to learn new look of Blogger HTML editor. Keep learning!!
Friday, February 20, 2009
Post Summary And Read More
My old friends here are very well aware of the Peek-A-Boo-Posts hack
that Ramani and I came up with several years ago. It required quite some
template hacking and javascript too.
In this tutorial you will learn how to tweak your blog without any javascript to get a similar effect. On our homepage, all posts will show a short summary, followed by a "Read More" link. Clicking the "Read More"-link will bring up the post page with the full post text.
Step 1: Back up your template
Open the Layout|Edit HTML-tab on your Dashboard, and download the template as an XML-file to your harddisk. If anything goes wrong, upload it again and there will be no problem at all.
Step 2: Modify the template code
Scroll down and look for the following piece of code:
This is the piece of template code that displays the post-body on the screen. We have to add a few lines of code here:
Now save your template.
Step 3: Modify your post template
In your Blog Settings you can modify the post template. Change it to:
And save your settings.
This will take care of all new posts. Type the summary text in between the summary-div-tags. Type the rest of the post between the other div-tags, and publish!
Step 4: Modify old posts
If you want older posts to have summaries as well, change every post and add a summary-div and restofpost-div.
And furthermore...
The summary-div is not really necessary, as the code only hides the restofpost-div if we are on the homepage. If you want some other styling for the summary, add CSS-tags to the skin-part of your blog.
In this tutorial you will learn how to tweak your blog without any javascript to get a similar effect. On our homepage, all posts will show a short summary, followed by a "Read More" link. Clicking the "Read More"-link will bring up the post page with the full post text.
Step 1: Back up your template
Open the Layout|Edit HTML-tab on your Dashboard, and download the template as an XML-file to your harddisk. If anything goes wrong, upload it again and there will be no problem at all.
Step 2: Modify the template code
Scroll down and look for the following piece of code:
<div class='post-body entry-content'>
  <data:post.body/>
  <div style='clear: both;'/> <!-- clear for photos floats -->
</div>
This is the piece of template code that displays the post-body on the screen. We have to add a few lines of code here:
<div class='post-body entry-content'>
  <b:if cond='data:blog.homepageUrl == data:blog.url'>
    <style type='text/css'>.restofpost {display:none;}</style>
  </b:if>
  <data:post.body/>
  <b:if cond='data:post.link'>
    <a expr:href='data:post.link'>Read more...</a>
  <b:else/>
    <b:if cond='data:post.url'>
      <a expr:href='data:post.url'>Read more...</a>
    </b:if>
  </b:if>
  <div style='clear: both;'/> <!-- clear for photos floats -->
</div>
Now save your template.
Step 3: Modify your post template
In your Blog Settings you can modify the post template. Change it to:
<div class="summary">Type summary here</div>
<div class="restofpost">Type rest of post here</div>
And save your settings.
This will take care of all new posts. Type the summary text in between the summary-div-tags. Type the rest of the post between the other div-tags, and publish!
Step 4: Modify old posts
If you want older posts to have summaries as well, change every post and add a summary-div and restofpost-div.
And furthermore...
The summary-div is not really necessary, as the code only hides the restofpost-div if we are on the homepage. If you want some other styling for the summary, add CSS-tags to the skin-part of your blog.
Sunday, February 15, 2009
Removing the Blogger Navbar
It is an oldie, but worth mentioning.
You can remove the blue Blogger navigation bar that is at the top of each page by adding a single line of CSS to the skin of your blog.
From your dashboard go to the Layout | Edit HTML screen and scroll down to the skin part of the blog.
Feel free to save your current template first by downloading it, but it is not really necessary as this is not a very risky modification.
Save and display, and finally you will be rid of the navigation bar.
You can remove the blue Blogger navigation bar that is at the top of each page by adding a single line of CSS to the skin of your blog.
From your dashboard go to the Layout | Edit HTML screen and scroll down to the skin part of the blog.
Feel free to save your current template first by downloading it, but it is not really necessary as this is not a very risky modification.
<b:skin><![CDATA[/*
 ...
 ...
#navbar {display:none;}
 ...
 ...
]]></b:skin>
Save and display, and finally you will be rid of the navigation bar.
More If Then Ideas
Now that my train of thought has started on how to use the <b:if> -
<b:else/> constructions to enhance the Bloggger experience, I got
some new ideas that really need some investigation.
Idea 1: Table of Contents
We can tweak the Blogpost Widget, so that it displays only posttitles when we are on the Blog Homepage, and full posts when we are on an Item Page. In the Blog Settings we can set that our Blog should display 365 days on 1 page, allowing for a maximum of 500 posts to be displayed.
Idea 2: Post Summaries on front page
By default, we have 1 Blogpost Widget on our Blog. But we can easily add a second Blogpost Widget to our Blog. We can modify Blogpost Widget #1 to be displayed only on the Homepage, and #2 to be displayed on Itempages.
In our posts we could use 2 span-tags, one for a summary and one for a full post text. In Blogpost Widget #1 we only display the summary-span, in Blogpost Widget #2 we only display the full text span. It can be done with javascript. The challenge is to see if it can be done without!
Idea 3: Featured Posts on front page
If we can have 2 Blogpost Widgets, we can have 3 as well.
Widget #1 shows on item pages, just as we are used to. Widget #2 and #3 are shown only on the Homepage, where #2 filters for 'Tutorial' and #3 filters for 'Template'. And #2 and #3 are side by side.
Well, I have to do some experimenting to get this to work. Please feel free to create your own solutions, and throw in your own ideas as well!
Idea 1: Table of Contents
We can tweak the Blogpost Widget, so that it displays only posttitles when we are on the Blog Homepage, and full posts when we are on an Item Page. In the Blog Settings we can set that our Blog should display 365 days on 1 page, allowing for a maximum of 500 posts to be displayed.
Idea 2: Post Summaries on front page
By default, we have 1 Blogpost Widget on our Blog. But we can easily add a second Blogpost Widget to our Blog. We can modify Blogpost Widget #1 to be displayed only on the Homepage, and #2 to be displayed on Itempages.
In our posts we could use 2 span-tags, one for a summary and one for a full post text. In Blogpost Widget #1 we only display the summary-span, in Blogpost Widget #2 we only display the full text span. It can be done with javascript. The challenge is to see if it can be done without!
Idea 3: Featured Posts on front page
If we can have 2 Blogpost Widgets, we can have 3 as well.
Widget #1 shows on item pages, just as we are used to. Widget #2 and #3 are shown only on the Homepage, where #2 filters for 'Tutorial' and #3 filters for 'Template'. And #2 and #3 are side by side.
Well, I have to do some experimenting to get this to work. Please feel free to create your own solutions, and throw in your own ideas as well!
Admin Widget
In my last post
I taught you how to remove the ugly Blogger navbar from the screen. One
minor setback is that now you don't have access to your dashboard,
settings, layout and posts, because the navbar is gone.
In this post you will learn how to add an Admin Widget to your sidebar.
Step 1: Backup your template
Although this is not a very risky modification, it is always good practice to backup your template before modifying it.
Go to the Layout|Edit HTML-tab, and download your template as an XML-file and save it to your harddisk.
Step 2: Create an new Link Widget in your sidebar
From the Layout|Page Elements tab Add a Widget to your sidebar. Select the link-widget from th list. Set the title for example to Admin, and add 4 links to the list.
Step 3: Save
Save the Widget and display your Blog. If you are viewing your Blog, clicking one of the Admin links will bring you to the appropriate screen. Visitors of your Blog will not be able to modify it, because they are not logged in to your blog. If you are not logged in, clicking an admin-link will bring up the Blogger login screen.
In this post you will learn how to add an Admin Widget to your sidebar.
Step 1: Backup your template
Although this is not a very risky modification, it is always good practice to backup your template before modifying it.
Go to the Layout|Edit HTML-tab, and download your template as an XML-file and save it to your harddisk.
Step 2: Create an new Link Widget in your sidebar
From the Layout|Page Elements tab Add a Widget to your sidebar. Select the link-widget from th list. Set the title for example to Admin, and add 4 links to the list.
Dashboard       : http://www.blogger.com/home
Change Settings : http://www.blogger.com/blog-options-basic.g?blogID=####
Change Layout   : http://www.blogger.com/rearrange?blogID=####
Edit Posts      : http://www.blogger.com/post.g?blogID=####
New Post        : http://www.blogger.com/post-create.g?blogID=####
In this links you have to change the ####### to the ID of your Blog. The easiest way to do this is to go to your dashboard, and view the list of your blogs. Hover your mouse over the links (Layout, Settings, etc) and watch the status-bar of your browser. You will see the link there. The easiest way is to right-click each link, copy the hyperlink, and paste it into the link widget.
Step 3: Save
Save the Widget and display your Blog. If you are viewing your Blog, clicking one of the Admin links will bring you to the appropriate screen. Visitors of your Blog will not be able to modify it, because they are not logged in to your blog. If you are not logged in, clicking an admin-link will bring up the Blogger login screen.
Saturday, February 14, 2009
Selective display of widgets
Here is a small tutorial on how to display your blog's widgets selectively on your pages.
Let's suppose you only want to show your Profile Widget on your blog's Homepage, but not on the other pages. This is how it is done.
Step 1: Back up your template
Go to your blog's Layout Page, and enter HTML-edit mode. Download your template as an XML-file and store it in a safe place. In case template-hacking takes a wrong turn somewhere, you can upload your template-file again and you are back to normal.
Step 2: Find the Profile Widget
Expand the widget-code by checking the checkbox on the HTML-edit page. Now scroll down and look for the Profile Widget, that looks like this:
Step 3: Modify the widget code
Now we only want to display this widget if the page that we are looking at is our blog's Homepage. We will use a <b:if>-statement to check for this situation.
Insert the following (red) lines of code into the widget code:
The datafield data:blog.homepageUrl contains the url of your blog's homepage. The datafield data:blog.url holds the url of the current page. If they are the same (==) we are on the homepage and the widget should be displayed. If they are not the same, the widgetcode is skipped.
Step 4: Save your template
Save your template and display your blog.
Let's suppose you only want to show your Profile Widget on your blog's Homepage, but not on the other pages. This is how it is done.
Step 1: Back up your template
Go to your blog's Layout Page, and enter HTML-edit mode. Download your template as an XML-file and store it in a safe place. In case template-hacking takes a wrong turn somewhere, you can upload your template-file again and you are back to normal.
Step 2: Find the Profile Widget
Expand the widget-code by checking the checkbox on the HTML-edit page. Now scroll down and look for the Profile Widget, that looks like this:
<b:widget id='Profile1' locked='false' title='About Me' type='Profile'>
<b:includable id='main'>
<b:if cond='data:title != ""'>
<h2><data:title/></h2>
</b:if>
<div class='widget-content'>
...
...
</div>
</b:includable>
</b:widget>
Step 3: Modify the widget code
Now we only want to display this widget if the page that we are looking at is our blog's Homepage. We will use a <b:if>-statement to check for this situation.
Insert the following (red) lines of code into the widget code:
<b:widget id='Profile1' locked='false' title='About Me' type='Profile'> <b:includable id='main'> <b:if cond='data:blog.homepageUrl == data:blog.url'> <b:if cond='data:title != ""'> <h2><data:title/></h2> </b:if> <div class='widget-content'> ... ... </div> </b:if> </b:includable> </b:widget>
The datafield data:blog.homepageUrl contains the url of your blog's homepage. The datafield data:blog.url holds the url of the current page. If they are the same (==) we are on the homepage and the widget should be displayed. If they are not the same, the widgetcode is skipped.
Step 4: Save your template
Save your template and display your blog.
Wednesday, February 11, 2009
Breadcrumbs for Blogger
With my new Blog Skin I also introduced a "Breadcrumb Trail" to my Blog.
If this doesn't ring a bell, don't worry. Remember the Hansl &
Gretchen fairy-tale?
Hansl and Gretchen were 2 kids from a very poor family. The parents were so poor that they had nothing to feed their children, and between them decided to take the kids into the forest and leave them to the wild animals. Hansl and Gretchen discovered these terrible plans, and decided to take pre-emtive measures. They took with them a piece of bread, and dropped breadcrumbs along the trail in order to find their way home. As might be expected, they didn't find home and they were captured by an evil witch (the breadcrumbs were eaten by birds, I guess). But the general idea got a strong foothold in the internet world, and nowadays you can find a breadcrumb trail on many a website to find your way back to the Home Page.
On the main page of my Blog there is no breadcrumb, because that is .... Home!
But as soon as you click on a specific post title, or on a label, or on an archive entry, you will see how the breadcrumb magically appears on top of the page:
Browse » Home » Tutorials » Breadcrumbs for Blogger
Now, here is an easy piece of code to put into your template, and breadcrumbs will be yours!
Step 1: Save your template
Go to the Layout tab, and click Edit HTML.
Download your template as an XML-file and save it onto your harddisk. If anything goes wrong, upload it again and not much harm will be done.
Step 2: Expand the widget code
Now check the checkbox to display your template's XML-code. Ready to hack? Here we go!
Step 3: Add a new Includable
We are going to modify the code of the Blog-widget. The default-widget uses a so-called "includable" (a chunk of code) to display a status-message above your posts when you have selected all posts with a certain label. We will turn off this default status message, and replace it with our breadcrumbs.
Scroll down through your expanded widget code and look for the following piece of code:
Now we will switch off the default status-message, by putting comments-brackets around it. (You can also delete the line, but I think leaving it there and commenting it out is more elegant in case you want to track back and debug).
Now add the following line, that will call our breadcrumb includable:
Immediately above this 'main' includable, insert our new breadcrumb includable:
You can also download the xml-code for the includable here:
Breadcrumb includable
Right-click the link, and select "Save as..." to save the XML-file on your harddisk. You can open it with Notepad, and copy-paste the code into your template.
Step 4: Add some CSS to the skin
The basic code of your breadcrumb is now in place. You can change its looks by adding a CSS-class .breadcrumbs to the skin of your Blog.
This is just an example:
Step 5: Save your template
Save your template and view the results. Enjoy!
Troubleshooting
The code above was copy-pasted directly from my template into this post, so it should be error-free if your copy-paste it into your template.
Be sure to have the latest widget-versions in your template. As you maybe know (or then again, maybe not) the widgets code (such as your Blog Posts) is updated regularly by Blogger, providing you with new functionalities. But if you have hacked into the code of the widget, Blogger will NOT update to the newest version of the code.
If you want to be sure that the most recent version of a widget is present on your blog, you can click the "Return to default widgets"-link in the Layout-HTML editor.
If you do not feel comfortible about modifying the code of your blog, create a new testblog for testing purposes. Add some Lorem ipsum posts (filled with nonsense text and fake labels), and see if the breadcrumbs work. If everything works fine, port it to your real blog.
Hansl and Gretchen were 2 kids from a very poor family. The parents were so poor that they had nothing to feed their children, and between them decided to take the kids into the forest and leave them to the wild animals. Hansl and Gretchen discovered these terrible plans, and decided to take pre-emtive measures. They took with them a piece of bread, and dropped breadcrumbs along the trail in order to find their way home. As might be expected, they didn't find home and they were captured by an evil witch (the breadcrumbs were eaten by birds, I guess). But the general idea got a strong foothold in the internet world, and nowadays you can find a breadcrumb trail on many a website to find your way back to the Home Page.
On the main page of my Blog there is no breadcrumb, because that is .... Home!
But as soon as you click on a specific post title, or on a label, or on an archive entry, you will see how the breadcrumb magically appears on top of the page:
Browse » Home » Tutorials » Breadcrumbs for Blogger
Now, here is an easy piece of code to put into your template, and breadcrumbs will be yours!
Step 1: Save your template
Go to the Layout tab, and click Edit HTML.
Download your template as an XML-file and save it onto your harddisk. If anything goes wrong, upload it again and not much harm will be done.
Step 2: Expand the widget code
Now check the checkbox to display your template's XML-code. Ready to hack? Here we go!
Step 3: Add a new Includable
We are going to modify the code of the Blog-widget. The default-widget uses a so-called "includable" (a chunk of code) to display a status-message above your posts when you have selected all posts with a certain label. We will turn off this default status message, and replace it with our breadcrumbs.
Scroll down through your expanded widget code and look for the following piece of code:
<b:includable id='main' var='top'>
  <!-- posts -->
  <div class='blog-posts hfeed'>

    <b:include data='top' name='status-message'/>

    <data:adStart/>
Now we will switch off the default status-message, by putting comments-brackets around it. (You can also delete the line, but I think leaving it there and commenting it out is more elegant in case you want to track back and debug).
<b:includable id='main' var='top'>
  <!-- posts -->
  <div class='blog-posts hfeed'>
  <!-- disable default status message
    <b:include data='top' name='status-message'/>
  default status message disabled -->
    <data:adStart/>
Now add the following line, that will call our breadcrumb includable:
<b:includable id='main' var='top'>
  <!-- posts -->
  <div class='blog-posts hfeed'>
  <!-- disable default status message
    <b:include data='top' name='status-message'/>
  default status message disabled -->
    <b:include data='posts' name='breadcrumb'/>
    <data:adStart/>
Immediately above this 'main' includable, insert our new breadcrumb includable:
<b:includable id='breadcrumb' var='posts'>
<b:if cond='data:blog.homepageUrl == data:blog.url'>
<!-- No breadcrumb on front page -->
<b:else/>
<b:if cond='data:blog.pageType == "item"'>
<div class='breadcrumbs'>
Browse » <a expr:href='data:blog.homepageUrl' rel='tag'>Home</a>
<b:loop values='data:posts' var='post'>
<b:if cond='data:post.labels'>
<b:loop values='data:post.labels' var='label'>
<b:if cond='data:label.isLast == "true"'> »
<a expr:href='data:label.url' rel='tag'><data:label.name/></a>
</b:if>
</b:loop>
» <span><data:post.title/></span>
</b:if>
</b:loop>
</div>
<b:else/>
<b:if cond='data:blog.pageType == "archive"'>
<div class='breadcrumbs'>
Browse » <a expr:href='data:blog.homepageUrl'>Home</a> » Archives for <data:blog.pageName/>
</div>
<b:else/>
<b:if cond='data:blog.pageType == "index"'>
<div class='breadcrumbs'>
<b:if cond='data:blog.pageName == ""'>
Browse » <a expr:href='data:blog.homepageUrl'>Home</a> » All posts
<b:else/>
Browse » <a expr:href='data:blog.homepageUrl'>Home</a> » Posts filed under <data:blog.pageName/>
</b:if>
</div>
</b:if>
</b:if>
</b:if>
</b:if>
</b:includable>
<b:includable id='main' var='top'>
You can also download the xml-code for the includable here:
Breadcrumb includable
Right-click the link, and select "Save as..." to save the XML-file on your harddisk. You can open it with Notepad, and copy-paste the code into your template.
Step 4: Add some CSS to the skin
The basic code of your breadcrumb is now in place. You can change its looks by adding a CSS-class .breadcrumbs to the skin of your Blog.
This is just an example:
<b:skin><![CDATA[/*

....

.breadcrumbs {
  float: left;
  width: 590px;
  font-size: 11px;
  margin: 5px 10px 20px 10px;
  padding: 0px 0px 3px 0px;
  border-bottom: double #EAEAEA;
}

....

]]></b:skin>
Step 5: Save your template
Save your template and view the results. Enjoy!
Troubleshooting
The code above was copy-pasted directly from my template into this post, so it should be error-free if your copy-paste it into your template.
Be sure to have the latest widget-versions in your template. As you maybe know (or then again, maybe not) the widgets code (such as your Blog Posts) is updated regularly by Blogger, providing you with new functionalities. But if you have hacked into the code of the widget, Blogger will NOT update to the newest version of the code.
If you want to be sure that the most recent version of a widget is present on your blog, you can click the "Return to default widgets"-link in the Layout-HTML editor.
If you do not feel comfortible about modifying the code of your blog, create a new testblog for testing purposes. Add some Lorem ipsum posts (filled with nonsense text and fake labels), and see if the breadcrumbs work. If everything works fine, port it to your real blog.
Monday, February 9, 2009
A New Skin
I finally got completely BORED with the old look-and-feel of Beautiful Beta. It was so totally not 2009.
And besides that, pageloading had slowed down tremendously because of all the javascript-widgets and other stuff that was hanging in my sidebars.
Furthermore, now that everybody has a 3-column template, it seemed time to turn back to an old-fashioned, well-designed, crisp and clear two column design. With lots of space for the post content, and a minimum of sidebar widgets.
The coming weeks I will clean up the posts, so Beautiful Beta will be up-to-date again.
And besides that, pageloading had slowed down tremendously because of all the javascript-widgets and other stuff that was hanging in my sidebars.
Furthermore, now that everybody has a 3-column template, it seemed time to turn back to an old-fashioned, well-designed, crisp and clear two column design. With lots of space for the post content, and a minimum of sidebar widgets.
The coming weeks I will clean up the posts, so Beautiful Beta will be up-to-date again.
Wednesday, September 3, 2008
Google Books Widget
Want to share your library with friends,
family and even the rest of the world? If that's the case, you can use
my new Google Books Library Widget. Please take a look and experiment
with this new widget, and let me know what you think about it.
Google Books
In Google Books you can create your own Library. Take a look here to see my small test library. As you can see, there are 2 books in this library, and I have written a small review for each of them. Creating your own Google Books Library is very easy. First of all, you need to have a Google account. As a Blogger user, you probably have one. After signing in on your Google account, select "more" from the menubar on the Google main page. This opens a small pop-up menu, where you can select "Books". This brings you to the Books-page, where you start creating your Library by "Importing Books". You can easily add books to your Library by entering a list of ISBN-numbers. Google will look up all bookdata. After importing some books, return to the Library page (click on "My Library" in the menubar), to see your Library Listing. Now you can add comments, reviews, and a ranking (0-5 stars) to your books. After setting up your Library, it is time to move on to creating the Google Books Library Widget.
Creating the Widget
Creating the Widget is done in a few easy steps:
1. Get your Google Books Library URL
Go to your Google Books Library page. Select the contents from your browser's address bar by right-clicking on it and selecting "copy" from the popup menu.
2. Create the Widget with Yahoo Pipes
Go to my Google Books Library Pipe by clinking on the link. In the entry-field, enter the URL by right-clicking and pasting the URL you just copied. Click the "Run Pipe" button. Your Library data are retrieved, and displayed as a list of titles and descriptions.
If the output is as you expected, go on to the next step.
3. Add the Widget to your Blog
Now click on "Get as a Badge". Badge is the Yahoo-word for Widgets. This will bring up the Badge Configuration Window. In this window, click on "Customize the size, type and settings of your Badge". In the entry-field again paste your Google Books URL and click "Next". Now select "Blogger" as the destination for your Badge. This brings you to the familiar Blogger-screen, where you can select the Blog, and enter the heading for the new Page Element. Click on "Add Widget", and afterwards view your Blog.
Google Books
In Google Books you can create your own Library. Take a look here to see my small test library. As you can see, there are 2 books in this library, and I have written a small review for each of them. Creating your own Google Books Library is very easy. First of all, you need to have a Google account. As a Blogger user, you probably have one. After signing in on your Google account, select "more" from the menubar on the Google main page. This opens a small pop-up menu, where you can select "Books". This brings you to the Books-page, where you start creating your Library by "Importing Books". You can easily add books to your Library by entering a list of ISBN-numbers. Google will look up all bookdata. After importing some books, return to the Library page (click on "My Library" in the menubar), to see your Library Listing. Now you can add comments, reviews, and a ranking (0-5 stars) to your books. After setting up your Library, it is time to move on to creating the Google Books Library Widget.
Creating the Widget
Creating the Widget is done in a few easy steps:
- Get the URL of your Google Books Library;
- Create a Widget with Yahoo Pipes;
- Add the Widget to your Blog.
1. Get your Google Books Library URL
Go to your Google Books Library page. Select the contents from your browser's address bar by right-clicking on it and selecting "copy" from the popup menu.
2. Create the Widget with Yahoo Pipes
Go to my Google Books Library Pipe by clinking on the link. In the entry-field, enter the URL by right-clicking and pasting the URL you just copied. Click the "Run Pipe" button. Your Library data are retrieved, and displayed as a list of titles and descriptions.
If the output is as you expected, go on to the next step.
3. Add the Widget to your Blog
Now click on "Get as a Badge". Badge is the Yahoo-word for Widgets. This will bring up the Badge Configuration Window. In this window, click on "Customize the size, type and settings of your Badge". In the entry-field again paste your Google Books URL and click "Next". Now select "Blogger" as the destination for your Badge. This brings you to the familiar Blogger-screen, where you can select the Blog, and enter the heading for the new Page Element. Click on "Add Widget", and afterwards view your Blog.
Saturday, August 2, 2008
Please change URL's
In my last post I have informed you of my ISP changing my homepage URL. I
hve repaired most of the links in this blog, but if you have installed
my widgets (such as Recent Posts and Recent Comments, you will have to
change the link in your own blog as well.
Please change all referrals to "http://home.planet.nl/~hansoosting/......." to "http://home.kpn.nl/oosti468/......" to get your widgets working again.
Good luck and sorry for the inconvenience.
Tip: download my javascript-files, and upload them at your own web-space.
Please change all referrals to "http://home.planet.nl/~hansoosting/......." to "http://home.kpn.nl/oosti468/......" to get your widgets working again.
Good luck and sorry for the inconvenience.
Tip: download my javascript-files, and upload them at your own web-space.
Wednesday, June 11, 2008
Speeding Up BlogTOC
Some of you who are using my (much
appreciated) BlogTOC widget have mentioned the long load times of their
blog as a result of the BlogTOC widget. Also, some of you want to
display the Table of Contents automatically, without the visitor having
to click on the Show TOC link.
Well, I will share some ideas with you regarding this subject.
Speeding up stuff
If you implement the BlogTOC widget in the standard way, the entire code of the widget is placed in a Blogger Page Element, usually somewhere at the top of you blog.
Now, while your Blog is loading, all code is processed from top to bottom. The piece of code that is the most time-consuming is the code that retrieves the Blogger Feed, parses it, and puts the data in a set of javascript arrays. This slows down loading, but once the data has loaded displaying it is done lightning-fast.
A good solution is, to move the retrieval-code to a page element that is completely at the bottom of your blog page.
I have moved the code to the bottom of the footer, and that has sped up loading a lot.
The code you have to move is this:
Automatic display of TOC
If you want the TOC to auto-display, add a simple line of javascript code at the end:
Well, I will share some ideas with you regarding this subject.
Speeding up stuff
If you implement the BlogTOC widget in the standard way, the entire code of the widget is placed in a Blogger Page Element, usually somewhere at the top of you blog.
Now, while your Blog is loading, all code is processed from top to bottom. The piece of code that is the most time-consuming is the code that retrieves the Blogger Feed, parses it, and puts the data in a set of javascript arrays. This slows down loading, but once the data has loaded displaying it is done lightning-fast.
A good solution is, to move the retrieval-code to a page element that is completely at the bottom of your blog page.
I have moved the code to the bottom of the footer, and that has sped up loading a lot.
The code you have to move is this:
<script src="http://yourblog.blogspot.com/feeds/posts/default?alt=json-in-script&start-index=1&max-results=100&callback=loadtoc"></script>
Automatic display of TOC
If you want the TOC to auto-display, add a simple line of javascript code at the end:
<script type="text/javascript">showToc();</script>
Friday, January 11, 2008
Aorta Widget
If you like mashups, you probably will
like my new Aorta Widget as well. It displays your life's bloddstream,
your Aorta, in the sidebar of your Blog. What is in your Aorta? Your
Blogger Blog feed, to begin with. But also your Flickr Photo's, your
Picasa Webalbums, and your YouTube Channel.
Easy Installation
Go to the Widget Installation & Downlaods Page, and click the Install Widget to Blog button. This will bring up the Widget Installer, where you can customize the widget before installation.
Enter the full url of your Blogger blog. If you have a Picasa Webalbums account, enter the Picasa username here. If you don't have a Picasa account, leave this field blank. If you have a Flickr account, enter your FlickrID here. Again, if you have no account, leave the field blank. Finally, enter your YouTube username, or leave blank if you have no YouTube presence.
Click Customize, and then Add to my Blog.
Easy Styling
Add custom CSS-classes to your skin. You need .bbaortabox, .bbaortaitem and .bbwidgetfooter.
Easy Installation
Go to the Widget Installation & Downlaods Page, and click the Install Widget to Blog button. This will bring up the Widget Installer, where you can customize the widget before installation.
Enter the full url of your Blogger blog. If you have a Picasa Webalbums account, enter the Picasa username here. If you don't have a Picasa account, leave this field blank. If you have a Flickr account, enter your FlickrID here. Again, if you have no account, leave the field blank. Finally, enter your YouTube username, or leave blank if you have no YouTube presence.
Click Customize, and then Add to my Blog.
Easy Styling
Add custom CSS-classes to your skin. You need .bbaortabox, .bbaortaitem and .bbwidgetfooter.
Wednesday, January 2, 2008
Pipe Your Plaxo Pulse Into Blogger
Well, I suppose that you know at least one word from this title: Blogger. Then it is time to get acquainted with Plaxo and Yahoo! Pipes.
Again, as in many other Widgets I have created, the Widget might be of
little practical use. But it has an educational purpose as well: it
shows how to mash up datafeeds from different websites, transform them
into JSON, so that you can easily pump the data into your Blogger
sidebar. So here we go!
Plaxo
Plaxo is a social network service, that you can use to maintain your personal and business networks. Plaxo has been out there for several years now, but the new idea of Plaxo Pulse has given new dimensions to the use of Plaxo. The Pulse lets you share all kind of information with your network. You can add blogfeeds, links, photo's, messages or polls to your Pulse, and share them with your friends, your family, business relations, or with all of them.
Yahoo! Pipes
With Yahoo! Pipes you can convert any feed from any webpage into something else. You can mash up data from different sources, and create your own feed with it.
Piping your Pulse into Blogger
For this new widget I enabled my Personal Pulse Feed in Plaxo. This means that there is a feed containing all 'events' that took place, for example changes in personal information (phonenumber, address, etc.), or links that I added to my Pulse. This feed is a standard RSS-feed, and that is of little use because the widget needs a JSON-formatted feed (I have explained the JSON-concept in another post).
So that is where Yahoo! Pipes come in handy. I created a simple pipe, that picks up the Plaxo Feed Url. The output of this pipe can be retrieved in JSON-format. And my new widget takes that JSON-output as its input.
Relax, it sounds more complicated than it is.
Setting Up Your Plaxo Feed
Assuming you have a Plaxo account, sign in on Plaxo, and select your Pulse.
Scroll down to the bottom of the page, and click on RSS Feeds. This brings you to the Pulse Stream RSS Feeds page. Here you can see the 5 possible feeds: Everyone, Business Network, Family, Friends, and Me.
Select one of them and click on Enable. The feed will be enabled, and you can copy the Feed Url from the textbox. Copy it to Notepad for now.
This was step 1. Easy, wasn't it?
Creating the Pipe
Assuming you have a Yahoo! account, go to http://pipes.yahoo.com and sign in.
At the top of the page, click on Create a pipe to bring up the Pipe Editor. You will see the empty canvas with the text drag modules here, and several modules to the left side of the canvas. Drag the Fetch Feed-module onto the canvas. Now copy the Plaxo Feed Url from Notepad, and paste it into the url-input box in the Fetch Feed Module. Now connect the Fetch Feed Module to the Pipe Output box. A blue line will appear. Guess what - you have just created your Pipe!
Click on the Pipe Output box to select it. In the Debugger window at the bottom of the screen you will see your Pipe's Output.
Now click the Save-button, and click Back to my pipes.
From this list of pipes, click on your newly created Plaxo Pipe to run it and view its output. At the top-right you will see a small Feed-icon, with the text More options. Click this link to open a small pop-up menu. Right-click on the menu option called Get as JSON and copy the link and save it in Notepad. You will need this JSON-Feed-Url in the next step.
You have now completed step 2.
Installing the Widget
Now it is time to install the widget to your Blog. Go to the Widgets and Downloads Page, and click the Add Plaxo Pulse Widget to my Blog button. This will start the Click-n-Go Installer. In the install-screen, enter the JSON-Feed-Url from your Yahoo Pipe, and set the maximum number of items to display. Click Customize to create the Widget code, and then Add to my Blog to add the Widget to one of your Blogs.
Add some CSS
For your convenience I have added 3 custom CSS classes:
Your Privacy
As far as I know, sharing the feed only shares the fact that you have added or changed information. The feed will NOT contain the new information. Clicking on a Pulse Item brings the user to the Plaxo Pages. Information is only visible after sign-in, for users who are connected to you.
I hope this has some use, or that it inspires you to delve further into Piping and JSON.
Plaxo
Plaxo is a social network service, that you can use to maintain your personal and business networks. Plaxo has been out there for several years now, but the new idea of Plaxo Pulse has given new dimensions to the use of Plaxo. The Pulse lets you share all kind of information with your network. You can add blogfeeds, links, photo's, messages or polls to your Pulse, and share them with your friends, your family, business relations, or with all of them.
Yahoo! Pipes
With Yahoo! Pipes you can convert any feed from any webpage into something else. You can mash up data from different sources, and create your own feed with it.
Piping your Pulse into Blogger
For this new widget I enabled my Personal Pulse Feed in Plaxo. This means that there is a feed containing all 'events' that took place, for example changes in personal information (phonenumber, address, etc.), or links that I added to my Pulse. This feed is a standard RSS-feed, and that is of little use because the widget needs a JSON-formatted feed (I have explained the JSON-concept in another post).
So that is where Yahoo! Pipes come in handy. I created a simple pipe, that picks up the Plaxo Feed Url. The output of this pipe can be retrieved in JSON-format. And my new widget takes that JSON-output as its input.
Relax, it sounds more complicated than it is.
Setting Up Your Plaxo Feed
Assuming you have a Plaxo account, sign in on Plaxo, and select your Pulse.
Scroll down to the bottom of the page, and click on RSS Feeds. This brings you to the Pulse Stream RSS Feeds page. Here you can see the 5 possible feeds: Everyone, Business Network, Family, Friends, and Me.
Select one of them and click on Enable. The feed will be enabled, and you can copy the Feed Url from the textbox. Copy it to Notepad for now.
This was step 1. Easy, wasn't it?
Creating the Pipe
Assuming you have a Yahoo! account, go to http://pipes.yahoo.com and sign in.
At the top of the page, click on Create a pipe to bring up the Pipe Editor. You will see the empty canvas with the text drag modules here, and several modules to the left side of the canvas. Drag the Fetch Feed-module onto the canvas. Now copy the Plaxo Feed Url from Notepad, and paste it into the url-input box in the Fetch Feed Module. Now connect the Fetch Feed Module to the Pipe Output box. A blue line will appear. Guess what - you have just created your Pipe!
Click on the Pipe Output box to select it. In the Debugger window at the bottom of the screen you will see your Pipe's Output.
Now click the Save-button, and click Back to my pipes.
From this list of pipes, click on your newly created Plaxo Pipe to run it and view its output. At the top-right you will see a small Feed-icon, with the text More options. Click this link to open a small pop-up menu. Right-click on the menu option called Get as JSON and copy the link and save it in Notepad. You will need this JSON-Feed-Url in the next step.
You have now completed step 2.
Installing the Widget
Now it is time to install the widget to your Blog. Go to the Widgets and Downloads Page, and click the Add Plaxo Pulse Widget to my Blog button. This will start the Click-n-Go Installer. In the install-screen, enter the JSON-Feed-Url from your Yahoo Pipe, and set the maximum number of items to display. Click Customize to create the Widget code, and then Add to my Blog to add the Widget to one of your Blogs.
Add some CSS
For your convenience I have added 3 custom CSS classes:
- .bbplaxobox: a wrapper containing the widget
- .bbplaxoitem: the item itself
- .bbwidgetfooter: the widget footer
Your Privacy
As far as I know, sharing the feed only shares the fact that you have added or changed information. The feed will NOT contain the new information. Clicking on a Pulse Item brings the user to the Plaxo Pages. Information is only visible after sign-in, for users who are connected to you.
I hope this has some use, or that it inspires you to delve further into Piping and JSON.
Monday, December 31, 2007
Google Calendar Widget
On the brink of the New Year we all update
our calendars, and shred the old ones. Perfect timing for a new Blogger
Sidebar Widget, that shows events from your Google Calendar in your
sidebar.
It is easy to install, so give it a try!
Install Widget
Go to the Widgets & Downloads Page and click the Add Calendar Widget To Blog button.
This will bring up a pop-up window, where you can customize the settings of the widget, before instlling it to one of your blogs.
Change the settings, then click Customize, and then click Add Widget to my Blog.
Preparing you Google Calendar
Before adding the Widget to your Blog, you need to prepare your Google Calendar to share events. Your calendar has to be public; private ones will not be shown in the widget.
You will find your Google calendars at http://calendar.google.com. On the left-hand side of the screen you can see the list of all your calendars, the ones owned by you, and the ones you have subscribed to. Each calendar has a small dropdown menu. Open this dropdownmenu for the calendar you want to share, and select "Calendar Settings". On the second tab, select the radiobutton to indicate that you want to share all calendar information with everyone. Now go to the first tab, and copy the calendar ID from this page; you will find it close to the bottom, between parentheses, following the XML/ICAL/HTML-buttons. You will need this ID to customize the widget. The ID will look like v4tfgsl4n3la@group.calendar.google.com.
If you feel insecure about this, create a test-calendar, and give it a try before sharing your real calendar.
Customizing the Widget
Go to the Widgets & Downloads Page and click the Add Calendar Widget To Blog button. This will bring up the customization-window.
You need to enter the following settings.
Widget Title
This sets the heading of the Widget in your Blogger sidebar.
Calendar ID
The ID of your public Google Calendar, that you copied from the Calendar Settings page. It is best to copy-paste this ID, to avoid typing errors.
Number of events
This is the number of events that will be displayed in the sidebar. Be aware that a maximum of 25 events can be displayed.
Calendar Owner Label
If you want the name of the calendar owner to be displayed, you can enter the label that you want to use here. The label is displayed in front of the owner name. Change it tou anything you like, or leave it blank.
Event Location Label
If you want the location of te event to be displayed, you can enter the label you want to use here. The label precedes the event location. Change it to anything you like, or leave it blank.
Date Label
The date label precedes the date of the event. Change it to anything you like, or leave it blank.
Time Label
The time label precedes the date of the event. Change it to anything you like, or leave it blank.
From Label and To Label
The from- and to-label precede the starttime and endtime of the event. Change them to anything you like, or leave it blank.
Whole Day Label
The Whole Day Label is displayed if an event takes an entire day. Change it to anything you like, or leave it blank.
Checkboxes
With the checkboxes you can select which information you want to display. If you uncheck all boxes, only the eventnames, dates and times will be displayed.
If you make a mistake, click Reset to reset to the defaults.
Adding the Widget to your Blog
Click Customize to create the Widget Code, then click Add to Blog to add the widget to your blog. This brings up a Blogger-window, where you can select the blog that you want to add the widget to.
Styling the Widget
If you want to style the widget, you can use the following custom CSS classes:
Feedback
Please let me know if this widget is useful.
I wish you all a happy New Year!
It is easy to install, so give it a try!
Install Widget
Go to the Widgets & Downloads Page and click the Add Calendar Widget To Blog button.
This will bring up a pop-up window, where you can customize the settings of the widget, before instlling it to one of your blogs.
Change the settings, then click Customize, and then click Add Widget to my Blog.
Preparing you Google Calendar
Before adding the Widget to your Blog, you need to prepare your Google Calendar to share events. Your calendar has to be public; private ones will not be shown in the widget.
You will find your Google calendars at http://calendar.google.com. On the left-hand side of the screen you can see the list of all your calendars, the ones owned by you, and the ones you have subscribed to. Each calendar has a small dropdown menu. Open this dropdownmenu for the calendar you want to share, and select "Calendar Settings". On the second tab, select the radiobutton to indicate that you want to share all calendar information with everyone. Now go to the first tab, and copy the calendar ID from this page; you will find it close to the bottom, between parentheses, following the XML/ICAL/HTML-buttons. You will need this ID to customize the widget. The ID will look like v4tfgsl4n3la@group.calendar.google.com.
If you feel insecure about this, create a test-calendar, and give it a try before sharing your real calendar.
Customizing the Widget
Go to the Widgets & Downloads Page and click the Add Calendar Widget To Blog button. This will bring up the customization-window.
You need to enter the following settings.
Widget Title
This sets the heading of the Widget in your Blogger sidebar.
Calendar ID
The ID of your public Google Calendar, that you copied from the Calendar Settings page. It is best to copy-paste this ID, to avoid typing errors.
Number of events
This is the number of events that will be displayed in the sidebar. Be aware that a maximum of 25 events can be displayed.
Calendar Owner Label
If you want the name of the calendar owner to be displayed, you can enter the label that you want to use here. The label is displayed in front of the owner name. Change it tou anything you like, or leave it blank.
Event Location Label
If you want the location of te event to be displayed, you can enter the label you want to use here. The label precedes the event location. Change it to anything you like, or leave it blank.
Date Label
The date label precedes the date of the event. Change it to anything you like, or leave it blank.
Time Label
The time label precedes the date of the event. Change it to anything you like, or leave it blank.
From Label and To Label
The from- and to-label precede the starttime and endtime of the event. Change them to anything you like, or leave it blank.
Whole Day Label
The Whole Day Label is displayed if an event takes an entire day. Change it to anything you like, or leave it blank.
Checkboxes
With the checkboxes you can select which information you want to display. If you uncheck all boxes, only the eventnames, dates and times will be displayed.
If you make a mistake, click Reset to reset to the defaults.
Adding the Widget to your Blog
Click Customize to create the Widget Code, then click Add to Blog to add the widget to your blog. This brings up a Blogger-window, where you can select the blog that you want to add the widget to.
Styling the Widget
If you want to style the widget, you can use the following custom CSS classes:
- .bbcalbox : wraps around the widget
- .bbcalname: the calendar name
- .bbcaldescription: the calendar description
- .bbcalowner: the calendar owner name
- .bbcaleventname: the title of the calendar event
- .bbcaleventdescription: the description of the calendar event
- .bbcaleventlocation: the location of the event
- .bbcaleventdatetime: the date/time information of the event
- .bbwidgetfooter: the widgetfooter
Feedback
Please let me know if this widget is useful.
I wish you all a happy New Year!
Subscribe to:
Posts (Atom)